Archivi tag: nailtech

Hacks for nails’ lover

Welcome back to my blog!

Today I want to tell you some tricks that maybe not everyone knows about the nail world!

Let’s start!

Nail polish removal with glitter

To add a bright touch to polishes, the ones studded with glitter are often used, which make a beautiful effect.

The problem arises while removing it.

We spend minutes rubbing with the cotton pad and acetone but the glitters remain attached as if they were glued with cement.

What to do then?

The method I use in these cases is to place the cotton pad on the nail, without rubbing it. Leave it there for about 5 minutes and then press it lightly to remove it.

This pack should facilitate the removal of the much loved but agonized glitter.

After removing everything, apply cuticle oil to moisturize the skin and nail.

If you want there are also glitter polishes that have a peel-off base, that lift up, so as to avoid problems during removal.
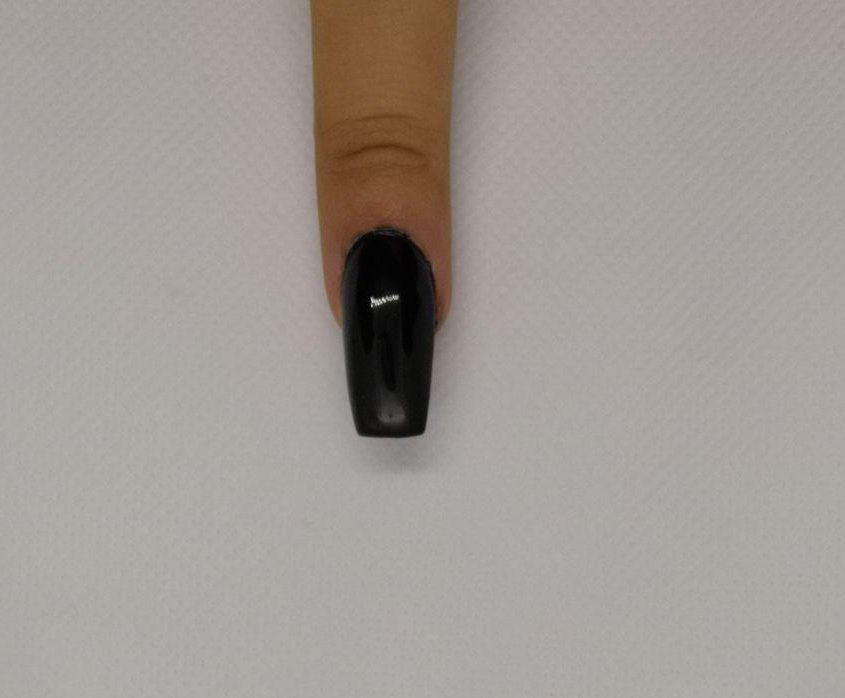
Polish lasting

When I applied polish on me people asked me if it was gel, seeing the luster but above all the duration.

In recent years, I often asked people how they applied nail polish and simply replied that they made two coats of color and that’s it.

For an optimal duration of simple polish, it is enough to have a base and a top coat.

I prefer separate bases and top coats instead of all in one.

Applying the base we prepare the nail, leveling it but above all giving it a base on which to cling.

After that apply two thin layers of color and make it dry at each step.

Furthermore, to avoid chipping, it is good to seal the polish to the free edge.

After drying the color, apply a well-laid layer of top coat and you’re done.

Maybe these steps can be obvious, but as I said before, not many people know that the base and the sealant greatly increase the lasting.

I also want to specify that the duration depends on the lifestyle of the people, and also on the underlying nails.

Brush cleaning

Now let’s talk about gel.

In order to use brushes to create layers of colors or decorations, we are forced to immerse them in the jar.

Once finished we use a paper towel to remove the color and the brush seems apparently clean.

But when we then immerse it in another color, we see that the previous one tends to come out.

So how do we get a paint to release completely from a brush?

You can buy the brush cleaner, a product specifically designed for cleaning brushes.

Or simply put on a surface a little bit of transparent gel or a top coat and rub the brush. Obviously you will see the various colors come out. Once the top coat is dirty, we dry the brush and repeat these steps until the top coat remains transparent.

These are the first tricks that I decided to offer you, the second part will be released soon.

If you liked the article, leave a like and share. If you have any questions or requests, do not hesitate to contact me.

See you soon!

SOFIA

Trucchetti per le unghie

Bentornati sul mio blog!

Oggi voglio esporvi alcuni trucchetti che magari non tutti conoscono per quanto riguarda il mondo delle unghie!

Iniziamo!

Rimozione smalto con i glitter

Per aggiungere un tocco luminoso allo smalto spesso si utilizzano quelli tempestati di glitter, che fanno un effetto bellissimo.

Il problema sorge durante la rimozione di esso.

Si passano minuti a strofinare con il dischetto di cotone e l’acetone ma i glitter rimangono attaccati come se fossero stati incollati con il cemento😂.

Cosa fare allora?

Il metodo che utilizzo io in questi casi è quello di appoggiare il dischetto di cotone sull’unghia, senza strofinarlo. Lasciarlo li per 5 minuti circa e poi facendo una leggera pressione rimuoverlo.

Questo impacco dovrebbe facilitare la rimozione dei tanto amati ma agognati glitter.

Dopo aver rimosso tutto, applicate l‘olio per le cuticole, per idratare bene la pelle e l’unghia.

Volendo in commercio hanno creato degli smalti glitter che hanno una base peel-off, ovvero che si solleva, in modo da evitare problemi durante la rimozione.

Durata dello smalto

Quando applicavo su di me lo smalto mi chiedevano se fosse gel, data la lucentezza ma soprattutto vedendo la durata.

In questi anni chiedevo spesso alla gente come applicavano lo smalto e mi rispondevano semplicemente che facevano due passate di colore e basta.

Per una durata ottimale del semplice smalto basta avere una base e un top coat.

Prediligo le basi e i top coat separati invece che quelli tutti in uno.

Applicando la base prepariamo l’unghia, livellandola ma soprattutto dandogli una base sulla quale aggrapparsi.

Dopo di che si applicano due strati sottili di colore, facendoli asciugare ad ogni passaggio.

Inoltre, per evitare sbeccature, è bene sigillare lo smalto al margine libero.

Dopo aver fatto asciugare il colore si applica uno strato ben steso di top coat e il gioco è fatto.

Magari questi passaggi possono essere scontati, ma come dicevo prima, non molti sanno che la base e il sigillante aumentano notevolmente la tenuta.

Voglio anche specificare che la durata dipende dallo stile di vita delle persone, e anche dalle unghie sottostanti.

Pulizia pennelli

Ora parliamo di gel.

Utilizzando i pennelli per realizzare strati di colori o decorazioni, siamo costrette ad immergerli nel barattolo.

Una volta finito utilizziamo uno scottex per rimuovere il colore e il pennello sembra apparentemente pulito.

Però quando poi lo andiamo ad immergere in un altro colore vediamo che tende ad uscire il colore precedente.

Come facciamo allora a far scaricare del tutto un colore da un pennello?

Si può acquistare il brush cleaner, un prodotto indicato apposta per la pulizia dei pennelli.

Oppure semplicemente poniamo su di una superficie del gel trasparente oppure un top coat e lì strofiniamo il pennello in questione. Ovviamente si vedranno i vari colori uscire. Una volta che il top coat è sporco, asciughiamo il pennello e ripetiamo questi passaggi finché il top coat rimarrà trasparente.

Questi sono i primi trucchetti che ho deciso di proporvi, prossimamente uscirà anche la seconda parte.

Se l’articolo vi è piaciuto lasciate un like e condividete. Se avete qualche domanda o richiesta, non esitate a contattarmi.

Se questo articolo vi è piaciuto lasciate un like e condividete.

Non dimenticate di seguirmi su Instagram e sul mio canale YouTube!

Alla prossima!

SOFIA

Halloween Nail Art

Welcome to my blog again!

Today I will return to show you what I have achieved by following a certain theme.

Since Halloween is celebrated tomorrow, October 31st, I decided to try my hand at creating something that reminded me of this event.

Let’s start!

Total Black

If we think of this holiday, the first thing that comes to mind is black, night and even fear😫.

First of all I thought of painting a fingernail in black.

In my case I did a reconstruction with a rather long tip.

Obviously you can use any type of material to get this result: polish, gel polish or color gel.

Soon on my instagram there will also be a video of how I made this reconstruction.

I also posted a video on YouTube, where I show how ai created this.

Click here to watch.

Pumpkin

Another fundamental element of Halloween is the pumpkin lantern!

This time, instead of making an element on every single nail, I decided to make a series of pictures on three of them.

In the realization I used color gels.

First of all I realized the nuance of the background, from dark blue to light blue. After making the moon I then inserted all the black elements, then I drew the pumpkin and the windows.

To give a bit of dimension to the whole I made white reflections on the black drawings and added the stars.

Obviously it is not mandatory to do 3 nails together. If you want, you can only choose one element and only make one.

Ghost

Ghosts, skulls, terrifying monsters, what a fear ..

I’m joking!

Here is the ghost I made.

On the black base I made the body lightening the black a little, obtaining the dark gray. With white I made the face and finally with light gray the contours that define his figure well.

I hope you enjoyed these ideas!

As I said, both gel and polish and gel polish can be used.

This is what I did several years ago with gel polishes! Maybe I’ll give you some more ideas.

In conclusion, these are my nail art ideas.

Share it and let me like it if you liked this article and see you soon!

SOFIA

Nail art per Halloween!

Benvenuti nuovamente sul mio blog!

Oggi torno a mostrarvi ciò che ho realizzato seguendo un certo tema.

Siccome domani, 31 ottobre si festeggia Halloween, ho deciso di cimentarmi nella creazione di qualcosa che ricordasse questo evento. Iniziamo!

Total Black

Se pensiamo a questa festività, la prima cosa che ci viene in mente è il nero, la notte e anche la paura😫.

Come prima cosa ho quindi pensato di pitturare tutta di nero un’unghia.

Io nel mio caso ho realizzato una ricostruzione con tip, piuttosto lunga.

Ovviamente si può usare qualsiasi tipo di materiale per ottenere questo risultato: smalto, semipermanente oppure gel color.

Sul mio instagram potete trovare il video di come ho realizzato questa ricostruzione.

Ho anche deciso di pubblicarlo su YouTube e in generale di aprire un canale, in modo da raggiungere più persone possibili e mostrarvi ciò di cui parlo nei miei articoli.

Zucca

Altro elemento fondamentale di Halloween è la lanterna zucca!

Questa volta invece di realizzare su ogni singola unghia un elemento, ho deciso di fare una specie di quadro su tre di queste.

Nella realizzazione ho usato i gel color.

Per prima cosa ho realizzato la sfumatura dello sfondo, dal blu all’azzurro. Dopo aver fatto la luna ho poi inserito tutti gli elementi neri, in seguito ho disegnato la zucca e le finestre.

Per dare un po’ di dimensione al tutto ho fatto riflessi bianchi sui disegni neri e ho aggiunto le stelle.

Ovviamente non è obbligatorio fare 3 unghie assieme. Volendo si può scegliere un solo elemento e realizzare solo quello.

Fantasmino

Fantasmi, teschi, mostri terrificanti, che paura..

Scherzo!

Ecco qua il fantasma che ho realizzato.

Un fantasmino con faccia da teschio, piuttosto carino.

Sulla base nera ho realizzato il corpo schiarendo un po’ il nero, ottenendo il grigio scuro. Col bianco ho fatto la faccia e infine con il grigio chiaro i contorni che definiscono bene la sua figura.

Spero che queste idee vi siano piaciute!

Come dicevo si può utilizzare sia il gel, che smalto e semipermanente.

Questo è ciò che ho realizzato parecchi anni fa con i semipermanenti! Magari vi do qualche idea in più.

In conclusione, queste sono le mie idee di nail art.

Se questo articolo vi è piaciuto lasciate un like e condividete.

Non dimenticate di seguirmi su Instagram e sul mio canale YouTube!

Alla prossima!

SOFIA

Nail art as Paintings

Welcome back to my blog!

Today I will show you the nail art I created inspired by pictorial styles and painters!

Let’s start.

Greek painting

One thing I thought could be done on the nails, were the motifs of the vases or of Greek painting.

On a white base, with a sock effect, I made these black weaves and patterns with a very thin brush.

Mondrian

Making a vast time gap, I decided to make Mondrian’s painting.

With his very precise and colorful paintings, it represented a turning point in the history of art.

His style is one of those that I really like, and despite the apparent ease of realization, it was a challenge for me.

Pollok

Another famous painter with his innovative technique of dripping was Pollok.

After creating a white base, I started to splash the nail with a brush.

As a material I used acrylic colors but very diluted. I tried by scruple to do it with color gels but their too thick consistency does not allow the realization of this technique.

When you do this make sure you don’t mess around😜.

Picasso

You say art you say Picasso.

One of the representatives of Cubism, has captivated us with his works broken down, but still reasoned.

I wanted to draw inspiration from his colors and his breakdown of perspectives.

Obviously with these nails I don’t want to pretend to copy them and put them on the same level, they are just tributes from a girl who loves to create and put herself to the test, especially on small surfaces like nails.

Keith Haring

If you hear the name, nothing will come to your mind, but as soon as you see his works you will immediately understand who I’m talking to.

His slightly cardboard style is suitable for making nails. On a white base I realized all the details with black and red.

In conclusion, these are the nail art that I wanted to offer combined with painting, I hope you enjoyed them and may have inspired you. If you liked this article, share it and leave a like, don’t forget to follow me on instagram.

See you soon!

SOFIA

Nail art come Quadri

Bentornati sul mio blog!

Oggi vi mostrerò le nail art che ho realizzato ispirandomi a stili pittorici e pittori!

Iniziamo.

Pittura greca

Una cosa che ho pensato si potesse realizzare sulle unghie, erano proprio i motivi dei vasi o comunque della pittura greca.

Su una base bianca, con effetto calza, ho realizzato con un pennello molto sottile questi intrecci e disegni neri.

Mondrian

Facendo un vasto salto temporale, ho deciso di realizzare la pittura di Mondrian.

Con i suoi quadri molto precisi e colorati, ha rappresentato una svolta nella storia dell’arte.

Il suo stile è uno di quelli che mi piace parecchio, e nonostante l’apparente facilità di realizzazione, è stata una sfida per me.

Pollok

Altro celeberrimo pittore con la sua tecnica innovativa del dripping è stato Pollok.

Dopo aver creato una base bianca, ho iniziato con un pennello a schizzare l’unghia.

Come materiale ho usato i colori acrilici però molto diluiti. Ho provato per scrupolo a farlo con i gel color ma la loro consistenza troppo densa non permette la realizzazione di questa tecnica.

Quando fate ciò assicuratevi di non sporcare in giro😜.

Picasso

Dici arte dici Picasso.

Uno dei rappresentanti del cubismo, ci ha ammaliato con le sue opere scomposte, ma pur sempre ragionate.

Ho voluto ispirarmi ai suoi colori e alla sua scomposizione di prospettive.

Ovviamente con queste unghie non voglio pretendere di copiarli e mettermi al loro stesso livello, sono solo degli omaggi da una ragazza che ama creare e mettersi alla prova, soprattutto su superfici piccole come le unghie.

Keith Haring

Magari sentendo il nome non vi verrà in mente nulla, ma appena vedrete le sue opere capirete subito di chi sto parlando.

Il suo stile un po’ cartonesco è adatto alla realizzazione sulle unghie. Su base bianca ho realizzato con il nero e il rosso tutti i dettagli.

In conclusione, queste sono le nail art che ho voluto proporvi abbinate alla pittura, spero vi siano piaciute e possano avervi ispirato.

Se questo articolo vi è piaciuto lasciate un like e condividete.

Non dimenticate di seguirmi su Instagram e sul mio canale YouTube!

Alla prossima!

SOFIA

Dip Powder: Top or Flop?

Welcome back to my blog!
I know it’s been a long time since my last article, but between work and summer I decided to take a break.

So here I am back and today I am here to talk about another apparently innovative technique, which however hides things often unspoken.

Let’s start!

Dip powder method, what is it?

Like the acrygel combined with polyforms, the dip powder method has also spread widely on social media through advertisements, which showed an easy and fast method to have impeccable nails.

In practice we are talking about an acrylic powder that is used in a different way than usual. (Some brands work like a normal acrylic when combined with the monomer).

After applying the base, dip the finger in the powder, or dust it over, after which a product is used that serves to seal that layer and at the same time serves to be able to dip the nail again. (If the explanation is not very clear going to look on youtube there are several videos).

In this way the color and the hypothetical structure are obtained.

Finally an activator is used that hardens the acrylic powder, allowing the filing.
Because yes, this procedure is done on nails with tip previously applied, to seal the whole and create a structure, as well as the color.

Convenience?

This way it seems much more practical and faster than a nail form reconstruction, and you can do it at home by yourself.

But like polyforms, practicality approaches the incorrectness of the fundamental rules for a reconstruction.

As the dust is very thin, it is impossible to create a structure.
A reconstructed nail without a structure is bound to break.

Hygiene

We have often talked about how important hygiene and compliance with certain rules are to avoid nail diseases.

As I said before, this method involves dipping the nail in a jar containing the powder.

This speech I make refers to those who use this technique in salons. If I use the jar for personal purposes only, there is no problem.

You can understand that if a client has some sort of mycosis or bacterium, it will lodge in the powder jar, and the next client could be infected.

Then you could think about dusting the dust over the nail, not letting the dust fall back into the original jar.
For hygiene reasons, the dust must then be thrown away for each customer.

So returning to the previous discussion, is working in this way convenient?
In my opinion no.

Although it may appear faster and easier, the risks of breakage of the reconstruction and of possible infections from mycosis or bacteria are present.

Obviously in the commercials that run on social networks, all this is not explained, but to capture more attention it focuses on the speed and apparent convenience of the method.

Here we are at the end of the article, I hope you enjoyed it and clarified your ideas on the Dip Powder method.

Everything I say is about my personal opinion, nobody is forced to think like me.

If you liked it, leave a like and share.
Until next time!

SOFIA

Dip Powder: metodo funzionale o no?

Bentornati sul mio blog!
So che e passato parecchio tempo dal mio ultimo articolo, ma tra il lavoro e l’estate ho deciso di prendere una pausa.

Eccomi dunque ritornata e oggi sono qui per parlare di un’altra tecnica apparentemente innovativa, che però nasconde cose spesso non dette.
Iniziamo!

Metodo Dip powder, cos’è?

Cosi come l’acrygel accostato alle polyform, anche il metodo dip powder si è diffuso molto sui social attraverso le pubblicità, che mostravano un metodo facile e veloce per avere delle unghie impeccabili.

In pratica stiamo parlando di una polvere acrilica che viene utilizzata in modo diverso dal solito. (Alcune marche funzionano come un normale acrilico se abbinate al monomero).

Dopo aver applicato la base, si immerge il dito nella polvere, o la si spolvera al di sopra, dopo di che si usa un prodotto che serve a sigillare quello strato e allo stesso tempo serve per poter immergere nuovamente l’unghia. (Se non è molto chiara la spiegazione andando a cercare su youtube ci sono parecchi video).

Cosi facendo gradualmente si ottiene il colore e la ipotetica struttura.

Infine si utilizza un attivatore che fa indurire la polvere acrilica, consentendo la limatura.
Perché si, questo procedimento si fa su unghie con tip applicate precedentemente, per sigillare il tutto e creare una struttura, oltre che al colore.

Convenienza?

Detta così dunque sembra molto più pratico e veloce di una ricostruzione con cartina, e che si possa fare anche a casa da soli.

Però così come le polyform, la praticità si accosta alla scorrettezza delle regole fondamentali per una ricostruzione.

Essendo la polvere molto sottile, è impossibile creare una struttura.
Un’unghia ricostruita senza struttura è destinata a rompersi.

Igiene

Abbiamo parlato spesso di quanto sia importante l’igiene e il rispetto di certe regole per evitare malattie sulle unghie.

Come dicevo prima, questo metodo prevede l’immersione dell unghia in un barattolo contenente la polvere.

Questo discorso che faccio si riferisce a chi usa questa tecnica nei saloni. Se uso il barattolo solo per scopo personale non c’è problema.

Potete capire che se una cliente presenta qualche sorta di micosi o batterio, esso alloggerà nel barattolo di polvere, e la prossima cliente potrebbe essere contagiata.

Allora si potrebbe pensare appunto di spolverare la polvere sopra l’unghia, non facendo ricadere la polvere nel barattolo originale.
Per questioni igieniche quest ultima dovrà essere poi buttata per ogni cliente.

Ritornando quindi al discorso di prima, lavorare in questo modo conviene?
Secondo la mia opinione no.

Nonostante possa apparire più veloce e facile, i rischi di rotture della ricostruzione e di possibili contagi da funghi o batteri sono presenti.

Ovviamente negli spot che girano sui social, tutto ciò non viene spiegato, bensì per catturare più attenzione ci si focalizza sulla velocità e apparente convenienza del metodo.

Eccoci alla fine dell’articolo, spero che vi sia piaciuto e vi abbia chiarito le idee sul metodo Dip Powder.

Ogni cosa che dico riguarda la mia personale opinione, nessuno è costretto a pensarla come me.

Se questo articolo vi è piaciuto lasciate un like e condividete.

Non dimenticate di seguirmi su Instagram e sul mio canale YouTube!

Alla prossima!

SOFIA

Refill with me: From palm on the beach to French

Welcome back!

Today I want to offer you a new type of article!

I will show you the various steps of the refill with various photos.

Let’s start!

Before

This is the first of my nail: a reconstruction with tip, with a design created with gel colors.

This was the result, just created.

I kept it for 30 days, and then decided it was time for the refill.

Here’s how it looked.

Change Form

The first thing I chose to do was to shorten the nail and change its shape. I went from a square to a round one.

I ran it all with an 80 file.

Color Removal

The next step was to remove the color, lower the structure and eliminate any lifts. I also did this with an 80 file.

Nail preparation

After removing the old one, it’s time to prepare for the new product.

So I pushed and removed the cuticles, matted the new portion of nails and applied nail prep, primer and the base for the gel.

Questa immagine ha l'attributo alt vuoto; il nome del file è photo_2019-08-04_19-44-14-e1564944293672.jpg

Cover

Since I want to create a deep french (if you want to know the details I invite you to read my last article), it’s time to apply the pink gel cover.

Questa immagine ha l'attributo alt vuoto; il nome del file è photo_2019-08-04_19-45-22-e1564944432914.jpg

Filings

After curing and cleansing, I start giving a hint of structure and adjust the various volumes.

Questa immagine ha l'attributo alt vuoto; il nome del file è photo_2019-08-04_19-48-03-e1564944578790.jpg

French colored

Following the line already created with the cover, I apply the color to create the french edge.

Questa immagine ha l'attributo alt vuoto; il nome del file è photo_2019-08-04_19-50-32-e1564944920833.jpg

Glitter

In order not to make the french boring, I decide to apply glitter at will.

Questa immagine ha l'attributo alt vuoto; il nome del file è photo_2019-08-04_19-50-37-e1564944946803.jpg

Clear builder

To seal the color and mix it with the cover, I make a layer of clear gel builder over the entire nail, and once cured, I finish filing it, to get the right structure.

Questa immagine ha l'attributo alt vuoto; il nome del file è photo_2019-08-04_19-50-41-e1564944990884.jpg

Top Coat

Once all the steps have been completed, it is time to polish and seal the nail.

Once this step is done, Design can also be finished but if you follow me for a while you can imagine that sober things are not for me in fact ..

Questa immagine ha l'attributo alt vuoto; il nome del file è photo_2019-08-04_19-50-46-e1564945305377.jpg

Decorations

I also decided to apply some decorations, including a bead and some rhinestones.

Not happy, I also designed doodles with white.

After

And here is the final result.

Although my nails are all different, they are not bad between them, because they are all full of sparkle ✨😂.

That’s all, I hope you enjoyed this new type of article.

If you want to leave like it, share it and see you soon!

SOFIA

Refill con me: Da palma sulla spiaggia a French

Bentornati!

Oggi voglio proporvi un nuovo tipo di articolo!

Mostrerò con voi i vari passaggi del refill con varie foto.

Iniziamo!

Prima

Questo è il prima della mia unghia: una ricostruzione con tip, con disegno creato con colori in gel.

Questo era il risultato, appena creata.

L’ho tenuta per 30 giorni, e poi ho deciso che era ora del refill.

Ecco come appariva.

Cambio Forma

La prima cosa che ho scelto di fare è stata quella di accorciare l’unghia e cambiarle la forma. Sono passata da una quadrata ad una rotonda.

Ho eseguito il tutto con una lima 80.

Rimozione colore

Il prossimo passaggio è stato quello di rimuovere il colore, abbassare la struttura ed eliminare aventuali sollevamenti. Anche questo l’ho fatto con una lima 80.

Preparazione dell’unghia

Dopo aver rimosso il vecchio, è ora di preparare per il nuovo prodotto.

Quindi ho spinto ed eliminato le cuticole, opacizzato la nuova porzione di unghie ed applicato nail prep, primer e base gel.

Cover

Siccome voglio creare una french profonda (se volete conoscere i dettagli vi invito a leggere il mio ultimo articolo), è il momento di applicare il gel cover rosa.

Limatura

Dopo aver polimerizzato e sgrassato, inizio a dare un accenno di struttura e aggiusto i vari volumi.

French colorato

Seguendo la linea già creata con il cover, applico il colore per creare la lunetta della french.

Glitter

Per non rendere noiosa la french, decido di applicare dei glitter a piacimento.

Builder clear

Per sigillare il colore ed amalgamarlo con il cover, faccio uno strato di builder gel trasparente su tutta l’unghia, e una volta polimerizzato, finisco di limarlo, per ottenere la giusta struttura.

Lucido

Una volta conclusi tutti i passaggi è il momento di lucidare e sigillare l’unghia.

Una volta fatto questo passaggio il Design può anche essere concluso ma se mi seguite da un po’ potete immaginare che le cose sobrie non fanno per me infatti..

Decorazioni

Ho deciso di applicare anche delle decorazioni, tra cui una perlina e degli strass.

Non contenta ho disegnato anche dei ghirigori con il bianco.

Dopo

Ed ecco il risultato finale.

Nonostante le mie unghie siano tutte diverse, tra di loro non stanno male, perchè tutte piene di scintillio ✨😂.

Con questo è tutto, spero che questo nuovo tipo di articolo vi sia piaciuto.

Se volete lasciate un mi piace, condividete e alla prossima!

SOFIA