Archivi tag: french

Come realizzare la french con il muretto

Come realizzare la french con il muretto

Ciao a tutti e bentornati sul mio blog.

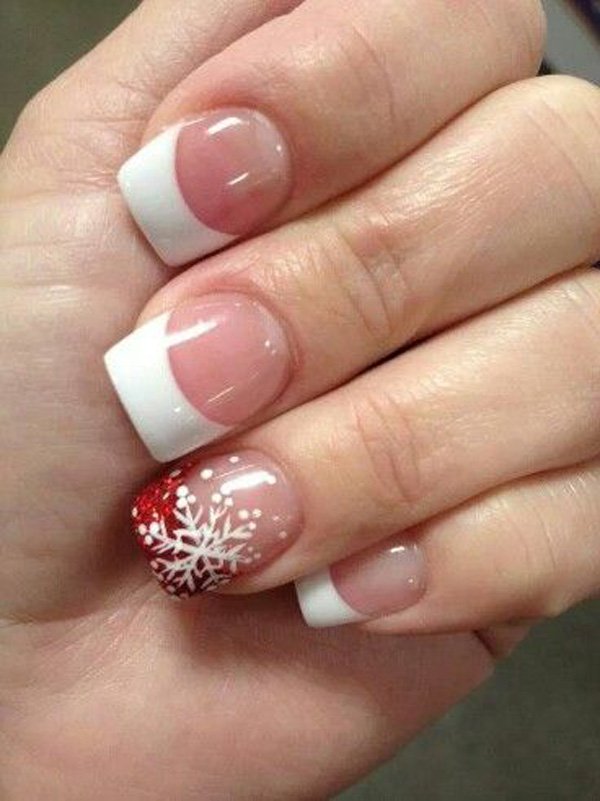
Oggi voglio spiegarvi come si realizza un french con la tecnica muretto.

Se volete sapere quali tipi di french esistono vi invito a leggere questo articolo.

Iniziamo!

Preparazione dell’unghia

Come in ogni ricostruzione o copertura dell’unghia naturale bisogna prima occuparsi della preparazione dell’unghia.

Spingo le cuticole, rimuovo quelle attaccate alla lamina ungueale e opacizza l’unghia naturale.

Applico i preparatori quindi nail prep e primer. In caso di necessità applico anche il primer non acido.

Applico la base.

Allungamento

Dopo aver adattato nel migliore dei modi la cartina alla nostra unghia la inserisco e creo un allungamento della lunghezza e della forma che desideriamo.

L’importante è che sia molto sottile.

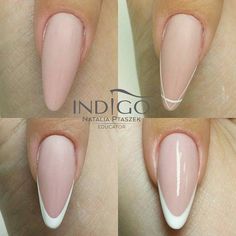
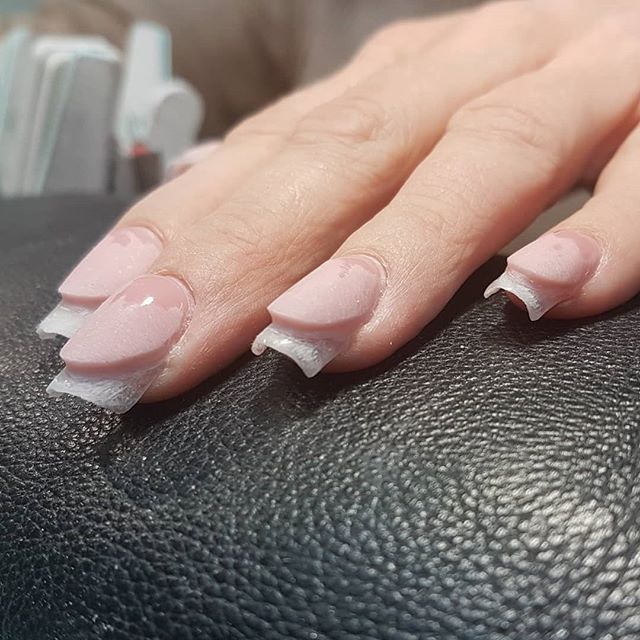
Muretto con cover rosa

Dopo aver rimosso la cartina ci occupiamo della allungamento del letto ungueale.

Questa tecnica si utilizza quando dobbiamo realizzare un french che è abbastanza lungo. Se immaginiamo di creare una lunghezza notevole su un unghia che ha un letto ungueale corto, il french risulterebbe sproporzionato.

Quindi con il cover rosa di un colore a nostra scelta possiamo allungare otticamente il letto ungueale.

Bisogna fare attenzione a scegliere un cover costruttore. Possibilmente consiglio di utilizzare uno che ha una densità abbastanza alta.

Stendo il primo strato a smalto in modo da uniformare il colore dell’unghia naturale e aiutarmi nella stesura e lavorazione del prodotto successivo.

Prelevo una quantità abbastanza abbondante di gel rosa e lo applico dove voglio che finisca è il mio letto ungueale.
Lo lavoro creando una linea del sorriso è abbastanza profonda e allungata.

Volendo posso già iniziare a creare un po’ di bombatura. Non è un problema si potrebbe anche scegliere di stenderlo vicino al giro cuticole abbastanza sottile e poi ricreare in seguito con un Builder trasparente la bombatura.

Il prodotto deve essere abbastanza spesso sul sorriso.

Limatura muretto

Una volta che abbiamo catalizzato e sgrassato passiamo alla limatura del muretto muretto.

Con una lima posizionata parallela al prodotto iniziamo a definirci in modo preciso la linea del sorriso in modo che poi applicando il colore e sa risulterà ben dritta.

Inoltre se ne ho bisogno limo anche la superficie del muretto uniformando il prodotto su tutta l’unghia.

Colore

Abbiamo quindi creato uno spazio vuoto per applicare il colore a nostra scelta.

Abbiamo varie alternative.

Si può utilizzare un costruttore bianco, un gel color o un semipermanente oppure volendo dei glitter.

Il mio caso vi spiegherò quei glitter ma il procedimento è lo stesso.

Con un pennellino sottile vado applicare sulla linea del sorriso il colore in modo pieno.

Senza prelevare altro colore con il pennellino ancora sporco sfumo quel che è già presente verso il margine libero.

Catalizzo il colore e applico uno strato leggero di Top Coat in modo da creare una superficie appiccicosa.
Scelgo i glitter di colore, forma e grandezza a mia scelta.

Li applico nel modo che preferisco e poi catalizzo.

Completamento struttura

Dopo di ciò dobbiamo andare a riempire il vuoto che si è creato tra il muretto e l’allungamento.

Utilizzo un costruttore trasparente.

Fate bene attenzione a non utilizzare quelli ad esempio con le fibre di vetro all’interno perché non saranno completamente trasparenti.

Vado quindi ad applicarlo dove manca il prodotto per livellare la superficie e nel caso in cui mancasse creo la bombatura.
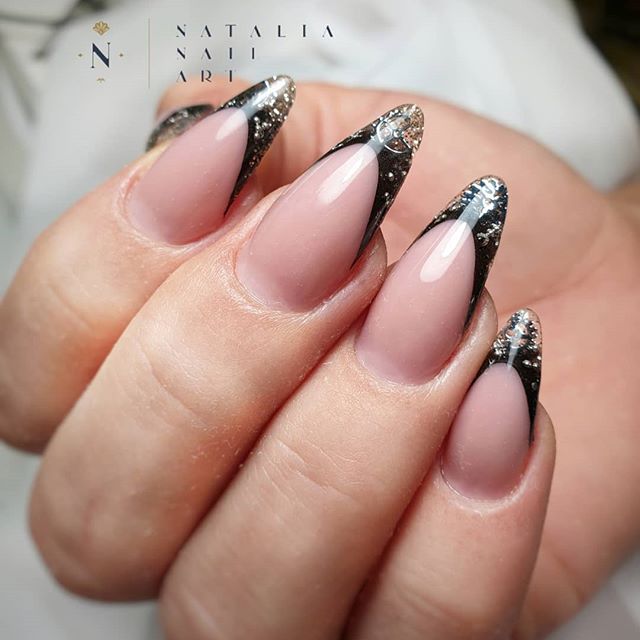
Limatura e top coat

Limo quindi la superficie che è stata creata secondo le regole della forma che abbiamo scelto.

Infine applico il top coat.

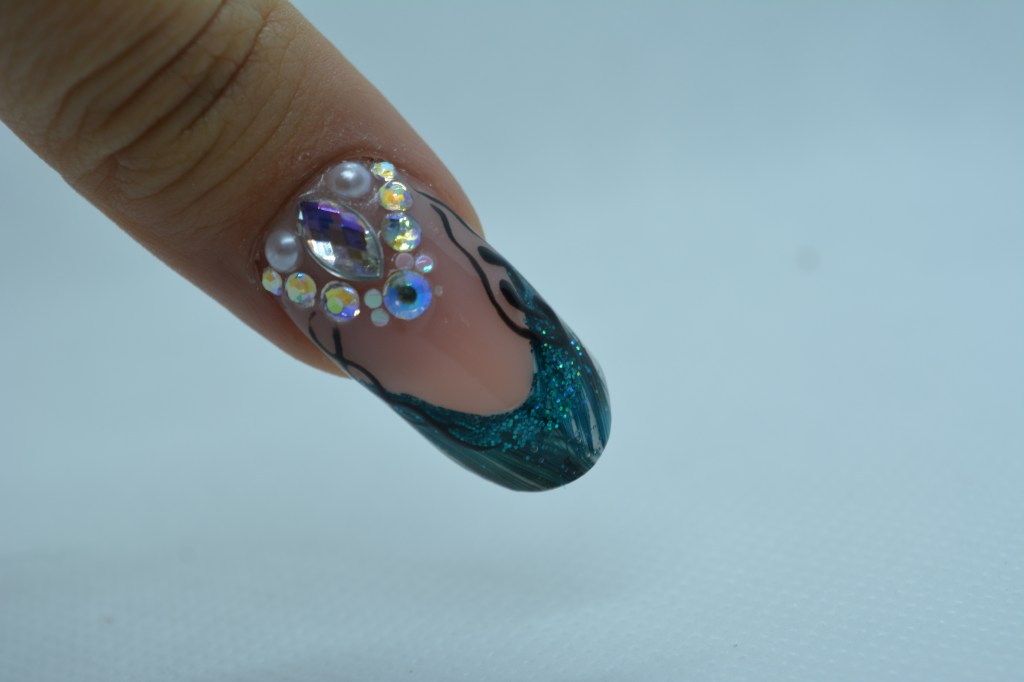
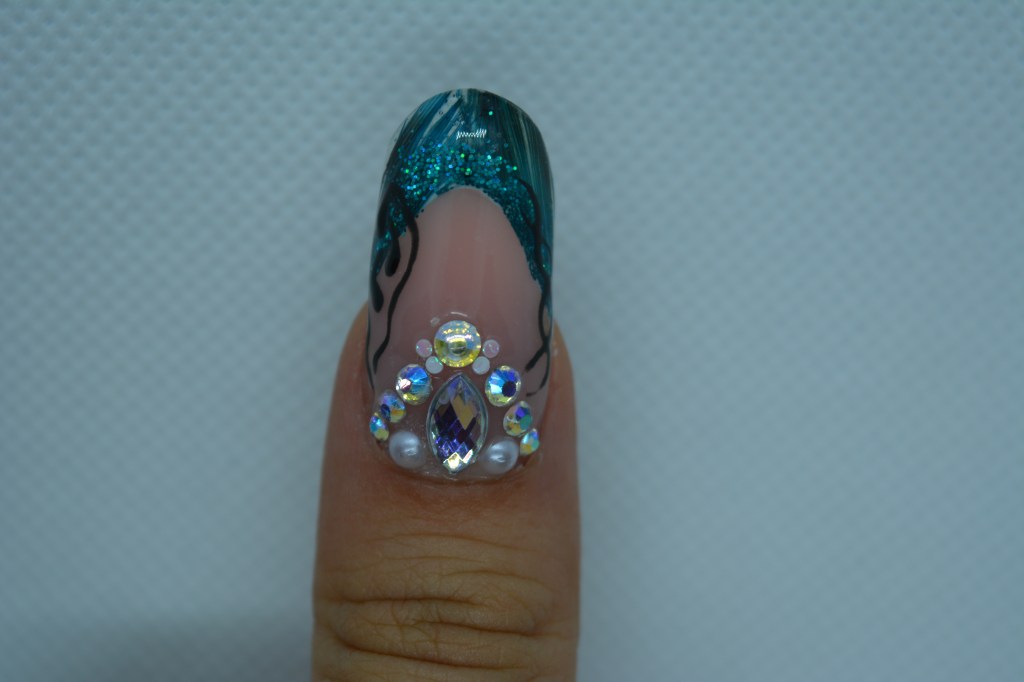
Ecco qua il risultato della mia french con tecnica a muretto.

Vi piace?

Se volete vedere realizzato questo unghia potete andare a guardare l’ultimo video sul mio canale youtube.

Vi lascio qui il link.

Se questo articolo Vi è piaciuto lasciate un like e condividete.

Non dimenticatevi di seguirmi su Instagram sul mio canale youtube.

Alla prossima!

SOFIA

How to make deep French

Hello everyone and welcome back to my blog.

Today I want to explain how a French is made with the wall technique.

If you want to know what types of French exist, I invite you to read this article.

Let’s begin!

Nail preparation

As in any nail reconstruction, you must first deal with the preparation of the nail.

I push the cuticles, remove those attached to the nail plate and mattify the natural nail.

I apply the nail prep and primer. If necessary, I also apply the non-acid primer.

I apply the base.

Length

After adapting the nail form in the best way, we attach it to our nail and create an extension of the length and shape we want.

The important thing is that it is very thin.

Wall with pink cover

After removing the nail form we take care of the lengthening of the nail bed.

This technique is used when we have to make a french that is long enough. If we imagine to create a considerable length on a nail that has a short nail bed, the French would be disproportionate.

So with the pink cover of a color of our choice we can optically lengthen the nail bed.

I possibly recommend using a gel that has a fairly high density.

I spread the first in a thin layer in order to uniform the color of the natural nail and help me in the drafting and processing of the next product.

I take a fairly large amount of pink gel and apply it where I want it to end is my nail bed.
Create a smile line quite deep and elongated.

If you want, I can already start creating a little apex. It is not a problem you could also choose to spread it close to the cuticle quite thin and then recreate the apex later with a transparent Builder.

The product must be thick on the smile line.

Wall filing

Once we have catalyzed we move on to the filing of the wall.

With a file positioned parallel to the product we begin to define precisely the smile line so that when applying the color it will result straight.

In addition, if I need it, I also file the surface of the wall by uniforming the product on the entire nail.

Color

We therefore created an empty space to apply the color of our choice.

We have various alternatives.

You can use a white builder you can use a color gel or a gel polish, or use glitter.

In my case I will explain those glitter but the procedure is the same.

With a thin brush I go to apply fully the color on the smile line.

Without taking other color with the brush still dirty I blend what is already present towards the free margin.

I catalyze the color and apply a light layer of Top Coat to create a sticky surface.
I choose the color, shape and size glitter of my choice.

I apply them in the way I prefer and then I catalyze.

Completion of the structure

After this we must go to fill the void that has been created between the wall and the nail.

I use a transparent builder.

Be careful not to use those with glass fibers inside for example because they will not be completely transparent.

I then go to apply it where there is no product to level the surface and in case it is missing I create the apex.

Filing and top coat

I file then the surface that was created according to the rules of the shape we have chosen.

Finally I apply the top coat.

Here is the result of my french with wall technique.

Do you like it?

If you want to see this nail made you can go to watch the latest video on my youtube channel.

I’ll leave the link here.

If you liked this article, leave a like and share.

Don’t forget to follow me on Instagram on my youtube channel.

See you next time!

SOFIA

Come realizzare la french 3D

Bentornati sul mio blog!
Oggi voglio spiegarvi come realizzare la french 3D.
Iniziamo!

Cos’è

La french 3D, è una decorazione che crea un effetto di ombre e profondità, realizzata come una french manicure.


Prodotti

Inizio subito dicendo quali prodotti consiglio di usare.
Siccome bisogna realizzare parecchi muretti, sconsiglio di usare il gel.
Io ho provato varie volte ad usarlo, ma i risultati sono pessimi.
Anche usando un gel poco autolivellante, il muretto non verrà mai ben definito.
Consiglio invece di usare l’acrilico, o il polygel, cone ho fatto io.
La realizzazione sarà molto più facile e veloce.

Ricostruzione

Io mi aiuterò con una mano finta.
Dopo aver opacizzato e preparato la mia unghia, eseguo l’allungamento, della forma e lunghezza che desidero.

Muretto rosa

Dobbiamo quindi lavorare con un french inverso profondo.
Realizzo quindi il mio primo muretto, con il polygel rosa.
Una volta polimerizzato, limo accuratamente la forma.

Colore

Dopo di che, applichiamo il colore sul muretto che si è formato e disegnamo la solita lunetta del french.


Muretto trasparente

Una volta che è stato polimerizzato il colore, lo ricopro con il polygel trasparente.
Mi assicuro di coprire il colore e creare abbastanza spessore, per poi poterlo limare.
Polimerizzo e limo di nuovo, per definirne la forma.


Ripeto i passaggi

Quindi bisogna ripetere gli stessi passaggi, fino a quando non siamo soddisfatti del nostro lavoro. È consigliato usare colori chiari, in modo da far notare maggiormente l’ombra che si viene a creare.


Struttura

Di sicuro una volta finito tutto ciò, la struttura risulterà più spessa di quanto dovrebbe essere.

Limiamo quindi la superficie dell’unghia.
Stiamo attenti però a non limare troppo, sennò rischiamo di eliminare il colore, rovinando la nail art.


Una volta finito tutto ciò, sigillo e il design è fatto!
Vi piace?
Non preoccupatevi se al primo tentativo non vi viene, io ci ho messo un po’ prima di capire come fare e quali prodotti usare, e ancora non mi viene perfettamente.
Di sicuro con la pratica miglioreró e di sicuro anche voi ci riuscirete.

Se questo articolo vi è piaciuto, lasciate un like e commentate!

Non dimenticate di seguirmi su Instagram e sul mio canale YouTube.

Alla prossima!

SOFIA

How to create 3D French

Welcome back to my blog!
Today I want to explain how to make French 3D.
Let’s begin!

What’s this

French 3D is a decoration that creates an effect of shadows and depth, made like a French manicure.

Products

I start immediately by saying which products I recommend to use.
Since you have to build several walls, I do not recommend using the gel.
I have tried several times to use it, but the results are bad.
Even using an harder gel, the wall will never be well defined.
I recommend instead of using acrylic, or polygel, as I did.
The realization will be much easier and faster.

Sculpting

I will help myself with a fake hand.
After having made opaque and prepared my nail, I create the nail, of the shape and length I want.

Pink wall

We must therefore work with a deep reverse French.
So I build my first wall, with pink polygel.
Once cured, I carefully define the shape.

Color

After that, I apply the color on the wall that has formed and I also draw the usual French smile line.

Clear wall

Once the color has been cured, I cover it with transparent polygel.
I make sure to cover the color and create enough thickness, to be able to file it.
I polymerize and define again the shape.

I repeat the steps

So we have to repeat the same steps, until we are satisfied with our work. It is recommended to use light colors, in order to make the shadow that is created more visible.

Structure

Certainly once all this is finished, the structure will be thicker than it should be.

So let’s file the nail surface.
We have to be careful in order not to file too much, otherwise we risk eliminating the color, ruining the nail art.

Once all this is done, seal and the design is done!

You like it?
Don’t worry if you don’t get it on the first try, it took me a while to figure out how to make and which products to use, and it still doesn’t come perfectly.
Certainly with practice I will improve and for sure you too will succeed.

If you liked this article, leave a like and comment!

Don’t forget to follow me on Instagram and on my YouTube channel.

See you next time!

SOFIA

Ideas to create Jewel nails

Welcome back to my blog!

Today I am here because I want to offer you ideas to make your nails real jewels.

Today we will add to the glitter, swaroski and beads.

Let’s begin!

Jewel nail on french

You will certainly remember this nail, I had inserted it in those where I showed how to create the under-glass effect.

To add some preciousness near the cuticle, I applied a large drop-shaped diamond to the center.

To frame and follow the figure of the rhinestones I have also decided to put glitter of increasing size.

To add instead a more delicate touch, I put pearls at the base of the diamond and finally two small iridescent dots.

Jewel nail on a single color base

To bring out the glitter to the maximum, I think it is appropriate to create a base that is as neutral as possible.

So after applying my chosen color, I decided to create my own composition.

The protagonist is the drop-shaped glitter.

As it is in relief, to fill the spaces that were created I added these violet stones and two other little diamonds, smaller and transparent.

To give a touch of color, I applied the gold bar and finally to make a somewhat elongated shape to the composition, I applied three decreasing glitter below it.

Jewel nail on a sugar effect base

If you want you can also choose to resume the brilliance of the glitter by creating a sugar effect on the nail.

In the idea I propose, I also applied a very large brilliant in the center.

Following its shape I surrounded it with pearls, which have fuchsia microspheres between them.

At the top I applied a boreal rhinestone, while at the bottom one that reflects the color of the base.

The latter was also surrounded by colored microspheres.

Jewel fingernail on a holographic basis

If the sugar effect was too intense, but a single color base would be too dull, there is a middle ground.

By creating a holographic effect on a white base, you can get the right brightness without being overdone.

So to maintain this delicacy, I applied a small rhinestone to the center and with even smaller ones I surrounded it, creating also two straight lines.

At the end of each line there are two blue microspheres.

Jewel nails on a fantasy base

There is also the possibility of embellishing a simple fantasy.

So above a zebra-striped nail, I chose to apply like a belt of glitter of a similar size, so as not to be too discordant with one another.

Here are some of my ideas for creating jewel nails, I hope you enjoyed them.

If you liked this article, leave a like and share.

Don’t forget to follow me on Instagram and on my Youtube channel!

See you soon!

SOFIA

Idee per creare unghie Gioiello

Bentornati sul mio blog!

Oggi sono qui perchè voglio proporvi delle idee per rendere le vostre unghie dei veri e propri gioielli.

Oggi abbonderemo con glitter, swaroski e perline.

Iniziamo!

Unghia gioiello su french

Quest’unghia la ricorderete di sicuro, la avevo inserita in quelle dove mostravo come poter creare l’effetto sottovetro.

Per aggiungere un po’ di preziosità vicino al giro cuticole, ho applicato al centro un grosso brillantino a forma di goccia.

Per incorniciare e seguire la figura dello strass ho deciso anche di mettere dei brillantini di grandezza crescente.

Per aggiungere invece un tocco più delicato ho messo delle perle alla base del brillantino e infine due piccoli pallini iridescenti.

Unghia gioiello su base monocolore

Per far risaltare al massimo i brillantini, penso sia opportuno creare una base che sia la più neutra possibile.

Dunque dopo aver applicato il mio colore a scelta, ho deciso di creare la mia composizione.

In protagonista è il brillantino a forma di goccia.

Siccome è in rilievo, per riempire gli spazi che si creavano ho aggiunto queste pietruzze viola e altri due diamantini, più piccoli e trasparenti.

Per dare un tocco di colore, ho applicato la barretta oro e infine per fare una forma un po’ allungata alla composizione, ho applicato tre brillantini decrescenti al di sotto di essa.

Unghia gioiello su base effetto zucchero

Volendo si può anche scegliere di riprendere la brillantezza dei glitter creando sull’unghia un effetto zucchero.

Nell’idea che propongo ho anche in questo caso applicato un brillante molto grande al centro.

Seguendo la sua forma l’ho contornato con delle perle, che tra di loro hanno delle microsfere fucsia.

In cima ho applicato uno strass boreale, in basso invece uno che riprende il colore della base.

Quest’ultimo è stato contornato anche lui con delle microsfere colorate.

Unghia gioiello su base olografica

Se l’effetto zucchero fosse troppo intenso, ma una base monocolore sarebbe troppo spenta, c’è una via di mezzo.

Creando un effetto olografico su di una base bianca, si potrà ottenere la giusta luminosità senza però essere esagerati.

Quindi per mantenere questa delicatezza, ho applicato al centro uno strass un po’ piccolo e con quelli ancora più piccoli l’ho contornato, creando anche due linee dritte.

Alla fine di ogni linea ci sono due microsfere blu.

Unghie gioiello su base a fantasia

C’è anche la possibilità di impreziosire una semplice fantasia.

Dunque al di sopra di un’unghia zebrata, ho scelto di applicare come una cintura di brillantini, di grandezza simile, per non essere troppo discordanti tra loro.

Ecco qui alcune mie idee per poter creare delle unghie gioiello, spero che vi siano piaciute.

Se questo articolo vi è piaciuto lasciate un like e condividete.

Non scordatevi di seguirmi su Instagram e sul mio canale Youtube!

Alla prossima!

SOFIA

Refill with me: From palm on the beach to French

Welcome back!

Today I want to offer you a new type of article!

I will show you the various steps of the refill with various photos.

Let’s start!

Before

This is the first of my nail: a reconstruction with tip, with a design created with gel colors.

This was the result, just created.

I kept it for 30 days, and then decided it was time for the refill.

Here’s how it looked.

Change Form

The first thing I chose to do was to shorten the nail and change its shape. I went from a square to a round one.

I ran it all with an 80 file.

Color Removal

The next step was to remove the color, lower the structure and eliminate any lifts. I also did this with an 80 file.

Nail preparation

After removing the old one, it’s time to prepare for the new product.

So I pushed and removed the cuticles, matted the new portion of nails and applied nail prep, primer and the base for the gel.

Questa immagine ha l'attributo alt vuoto; il nome del file è photo_2019-08-04_19-44-14-e1564944293672.jpg

Cover

Since I want to create a deep french (if you want to know the details I invite you to read my last article), it’s time to apply the pink gel cover.

Questa immagine ha l'attributo alt vuoto; il nome del file è photo_2019-08-04_19-45-22-e1564944432914.jpg

Filings

After curing and cleansing, I start giving a hint of structure and adjust the various volumes.

Questa immagine ha l'attributo alt vuoto; il nome del file è photo_2019-08-04_19-48-03-e1564944578790.jpg

French colored

Following the line already created with the cover, I apply the color to create the french edge.

Questa immagine ha l'attributo alt vuoto; il nome del file è photo_2019-08-04_19-50-32-e1564944920833.jpg

Glitter

In order not to make the french boring, I decide to apply glitter at will.

Questa immagine ha l'attributo alt vuoto; il nome del file è photo_2019-08-04_19-50-37-e1564944946803.jpg

Clear builder

To seal the color and mix it with the cover, I make a layer of clear gel builder over the entire nail, and once cured, I finish filing it, to get the right structure.

Questa immagine ha l'attributo alt vuoto; il nome del file è photo_2019-08-04_19-50-41-e1564944990884.jpg

Top Coat

Once all the steps have been completed, it is time to polish and seal the nail.

Once this step is done, Design can also be finished but if you follow me for a while you can imagine that sober things are not for me in fact ..

Questa immagine ha l'attributo alt vuoto; il nome del file è photo_2019-08-04_19-50-46-e1564945305377.jpg

Decorations

I also decided to apply some decorations, including a bead and some rhinestones.

Not happy, I also designed doodles with white.

After

And here is the final result.

Although my nails are all different, they are not bad between them, because they are all full of sparkle ✨😂.

That’s all, I hope you enjoyed this new type of article.

If you want to leave like it, share it and see you soon!

SOFIA

Refill con me: Da palma sulla spiaggia a French

Bentornati!

Oggi voglio proporvi un nuovo tipo di articolo!

Mostrerò con voi i vari passaggi del refill con varie foto.

Iniziamo!

Prima

Questo è il prima della mia unghia: una ricostruzione con tip, con disegno creato con colori in gel.

Questo era il risultato, appena creata.

L’ho tenuta per 30 giorni, e poi ho deciso che era ora del refill.

Ecco come appariva.

Cambio Forma

La prima cosa che ho scelto di fare è stata quella di accorciare l’unghia e cambiarle la forma. Sono passata da una quadrata ad una rotonda.

Ho eseguito il tutto con una lima 80.

Rimozione colore

Il prossimo passaggio è stato quello di rimuovere il colore, abbassare la struttura ed eliminare aventuali sollevamenti. Anche questo l’ho fatto con una lima 80.

Preparazione dell’unghia

Dopo aver rimosso il vecchio, è ora di preparare per il nuovo prodotto.

Quindi ho spinto ed eliminato le cuticole, opacizzato la nuova porzione di unghie ed applicato nail prep, primer e base gel.

Cover

Siccome voglio creare una french profonda (se volete conoscere i dettagli vi invito a leggere il mio ultimo articolo), è il momento di applicare il gel cover rosa.

Limatura

Dopo aver polimerizzato e sgrassato, inizio a dare un accenno di struttura e aggiusto i vari volumi.

French colorato

Seguendo la linea già creata con il cover, applico il colore per creare la lunetta della french.

Glitter

Per non rendere noiosa la french, decido di applicare dei glitter a piacimento.

Builder clear

Per sigillare il colore ed amalgamarlo con il cover, faccio uno strato di builder gel trasparente su tutta l’unghia, e una volta polimerizzato, finisco di limarlo, per ottenere la giusta struttura.

Lucido

Una volta conclusi tutti i passaggi è il momento di lucidare e sigillare l’unghia.

Una volta fatto questo passaggio il Design può anche essere concluso ma se mi seguite da un po’ potete immaginare che le cose sobrie non fanno per me infatti..

Decorazioni

Ho deciso di applicare anche delle decorazioni, tra cui una perlina e degli strass.

Non contenta ho disegnato anche dei ghirigori con il bianco.

Dopo

Ed ecco il risultato finale.

Nonostante le mie unghie siano tutte diverse, tra di loro non stanno male, perchè tutte piene di scintillio ✨😂.

Con questo è tutto, spero che questo nuovo tipo di articolo vi sia piaciuto.

Se volete lasciate un mi piace, condividete e alla prossima!

SOFIA

French Manicure: All types of a timeless classic

Welcome back!

Today I want to talk about the best known nail art: French Manicure.

I will illustrate the various typologies and I will explain in short the realization, let’s start!

French in Surface

This is the easiest to make and in the salons it is the most common one, for the speed of realization.

This typology can be realized both with polish, gel polish, gel and acrylic.

This is because you can draw it on a nude toned color or pink base, the white edge on the tip.

Easy to make, in the salons it is often made also for the convenience in the removal, since it is drawn on the surface.

Deep French

The Deep French is achievable in combination with a reconstruction.

After performing the stretch, proceed using a white gel or acrylic builder to create the edge.

All this before creating the apex, for this it takes the name of deep.

So once you have drawn the edge with white, you can proceed with the structure above, with a clear builder.

This type of French is recommended for those with a rather long nail bed by nature.

Deep and Reverse French

The procedure of this type is very similar to the previous one, but has variations.

Also this must be created below the structure and on a stretch in gel or acrylic.

In addition, you need to create what is called a “wall”, with a gel cover.

The gel cover is pink and you need to create the inverse of the white edge.

Once you have created this guideline, just place the white builder next to the pink one and you’re done.

This technique is used to create French on nail beds with color alterations, or on the most extreme and long forms.

Both this type and the previous one require more time and in the refill they will never be completely eliminated, because below the structure itself.

Speaking of french, we think of white to create the edge but of course we can choose the colors we prefer.

In the end the result should always be the same, without noticing the difference in technique used.

That’s all for today’s article, I hope I have clarified any doubts about the difference between the three techniques.

If you liked the article, share it and like it, see you soon!

SOFIA

French Manicure: Tutte le tipologie di un classico senza tempo

Bentornati!

Oggi voglio parlarvi della nail art e manicure più conosciuta: La French.

Illustrerò le varie tipologie e spiegherò in breve la realizzazione, iniziamo!

French Superficiale

Questa è la più facile da realizzare e nei saloni è quella più comune, per la velocità di realizzazione.

Questa tipologia si può realizzare sia con smalto, semipermanente, gel e acrilico.

Questo perchè basterà disegnare sopra una base color carne o rosa, la lunetta bianca in punta.

Facile da realizzare, nei saloni è realizzata spesso anche per la comodità nella rimozione, dato che è disegnata in superficie.

French Profonda

La French Profonda è realizzabile in abbinata ad una ricostruzione.

Dopo aver eseguito l’allungamento, si procede utilizzando un gel o acrilico builder bianco per creare la lunetta.

Tutto ciò prima di realizzare la bombatura, per questo prende il nome di profonda.

Quindi una volta disegnata la lunetta con il bianco, si può procedere con la struttura al di sopra, con un builder clear.

Questo tipo di French è consigliato a chi ha un letto ungueale piuttosto lungo di natura.

foto non mia

French Profonda e Inversa

Il procedimento di questa tipologia è molto simile a quella precedente, ma ha delle varianti.

Anche questa va creata al di sotto della bombatura e su di un allungamento in gel o acrilico.

In aggiunta bisogna creare quel che si chiama muretto, con un gel cover.

Il gel cover è rosa e bisogna creare l’inverso della lunetta bianca.

Una volta creata questa linea guida, basterà adagiare il builder bianco accanto a quello rosa e il gioco è fatto.

Questa tecnica è usata per creare french su letti ungueali con discromie, oppure sulle forme più estreme e lunghe.

foto non mia

Sia questo tipo che quello precedente richiedono tempi di realizzazione più lunghie e nel refill non verranno mai eliminati completamente, perchè al di sotto della struttura stessa.

Parlando di french, si pensa al bianco per reare la lunetta ma ovviamente ci si può sbizzarrire e scegliere i colori che più si preferiscono.

Alla fine il risultato dovrebbe essere sempre lo stesso, senza notare la differenza di tecnica usata.

Questo è tutto per l’articolo di oggi, spero di aver chiarito eventuali dubbi sulla differenza delle tre tecniche.

Se questo articolo vi è piaciuto lasciate un like e condividete.

Non dimenticate di seguirmi su Instagram e sul mio canale YouTube!

Alla prossima!

SOFIA