Partecipo al mio primo nail contest

Buongiorno a tutti!

Oggi voglio raccontarvi di un’esperienza a cui ho partecipato: il mio primo nail contest!

Iniziamo!

Cos’è

In generale un nail contest è una competizione amichevole tra tutte le onicotecniche o comunque ragazze che vogliono partecipare che sono appassionate al mondo delle unghie.

Dato che siamo tutti a casa, questo è un modo per svagarsi e concentrare le nostre forze su un qualcosa che ci appassiona.

Io tra i tanti concorsi che c’erano, ho deciso di partecipare a quello di Valentina Colonna, in collaborazione con l’azienda che rappresenta, Mistero Milano.

Mi piaceva ciò che aveva proposto quindi ho scelto di partecipare e il tema era la Bellezza.

Ognuno poteva realizzare ciò che al meglio rappresentasse la bellezza e io mi sono data alla pazza gioia!
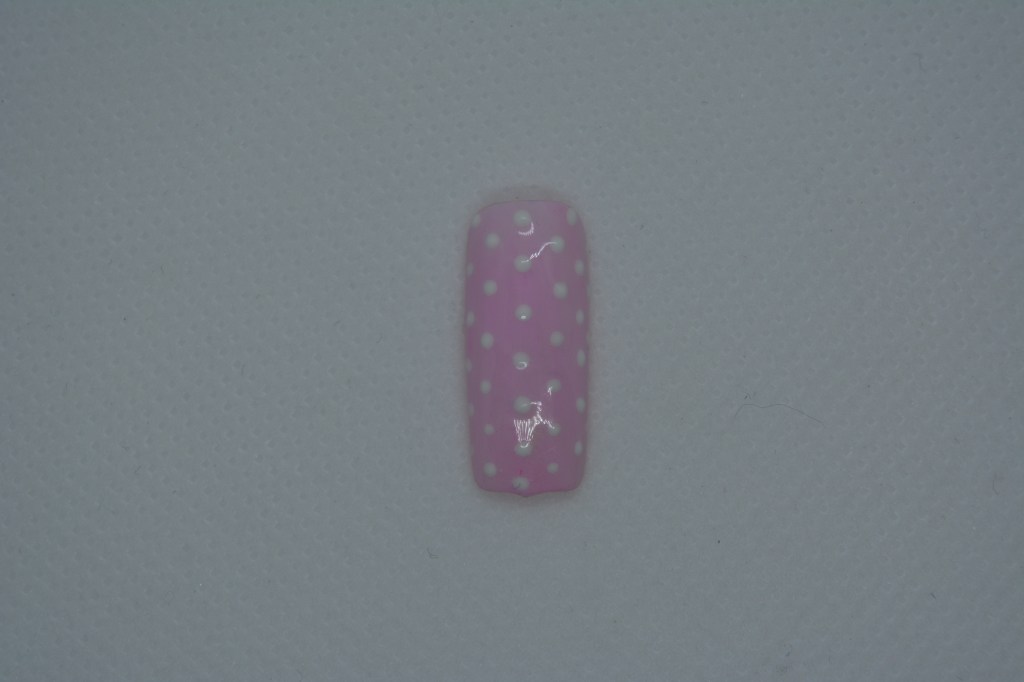
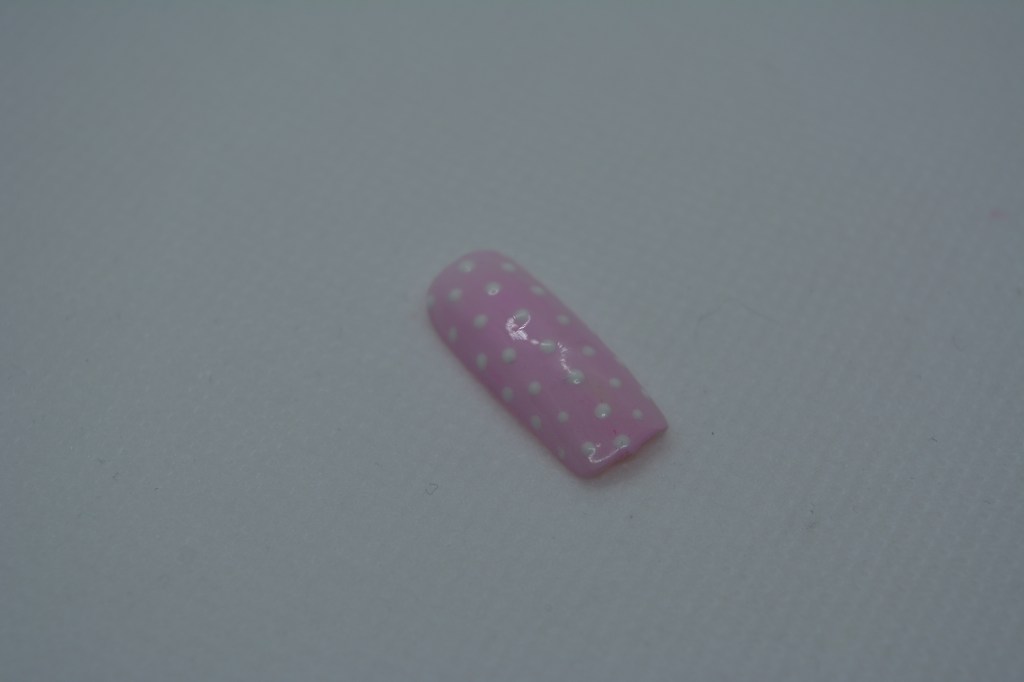
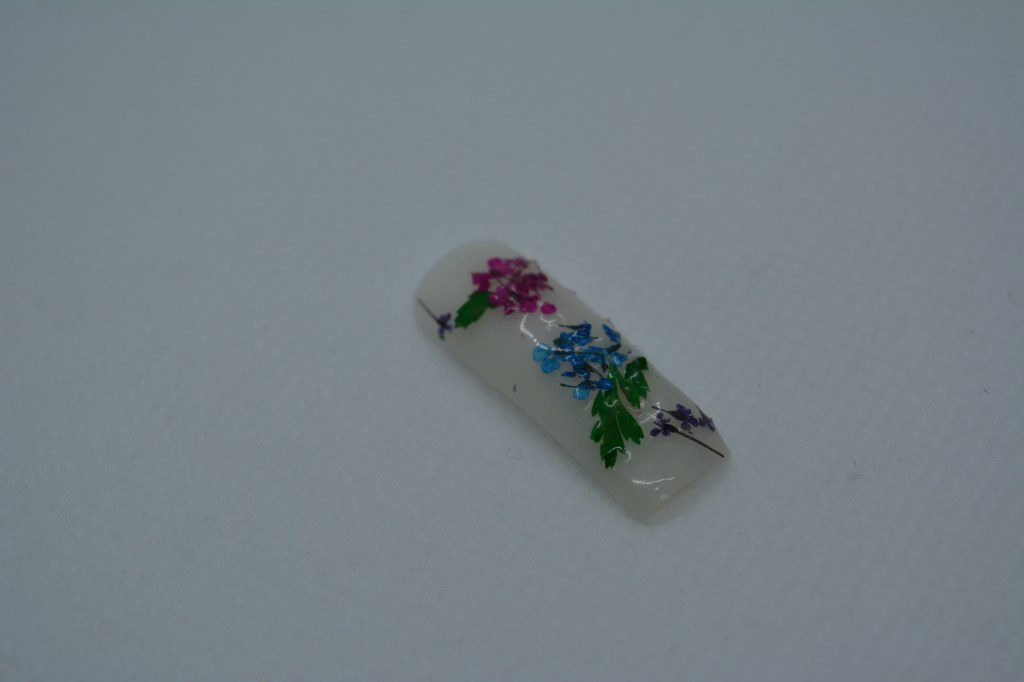
Prima proposta

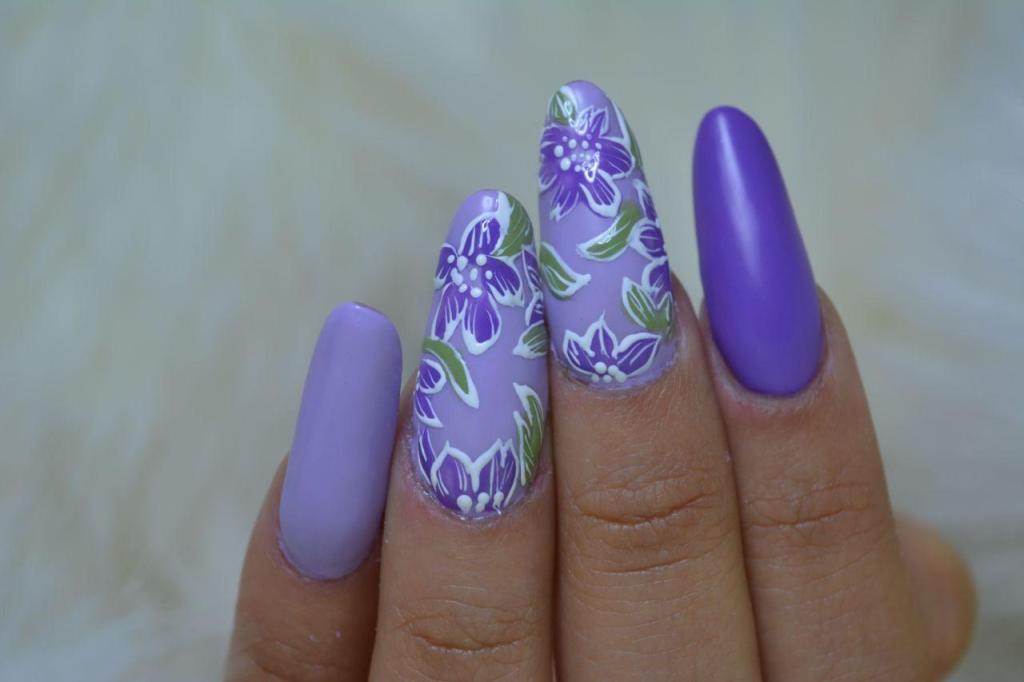
Ecco le prime unghie che ho realizzato.

Sapete tutti che adoro il viola e quindi ho deciso di utilizzare questo bellissimo colore e realizzare una nail art semplice e ad effetto.

I fiorellini danno quel tocco di delicatezza e armonia in piu!
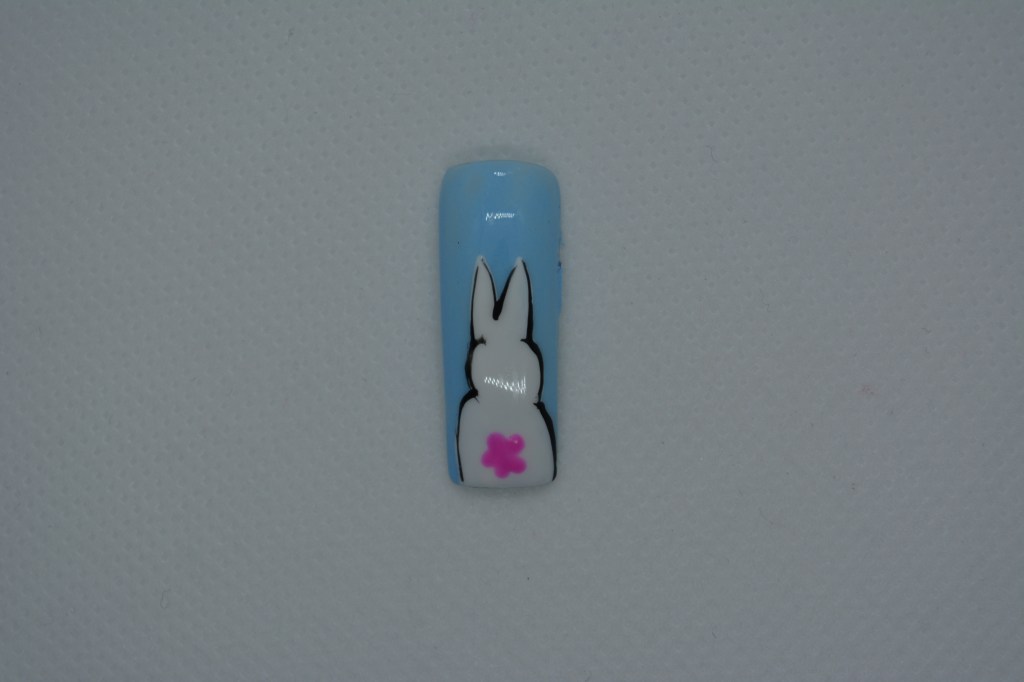
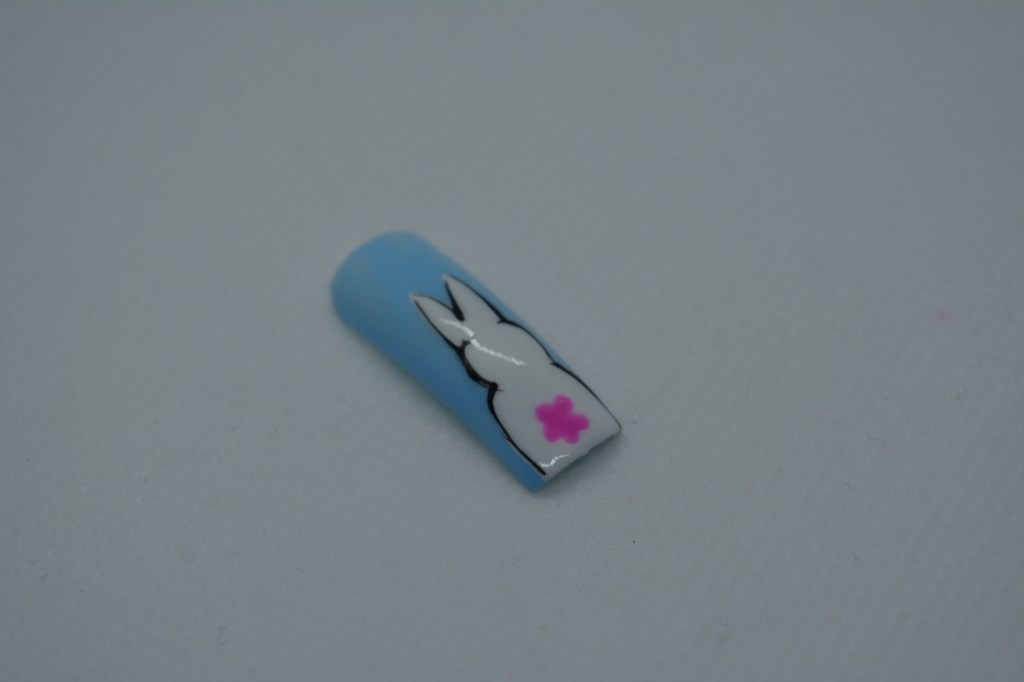
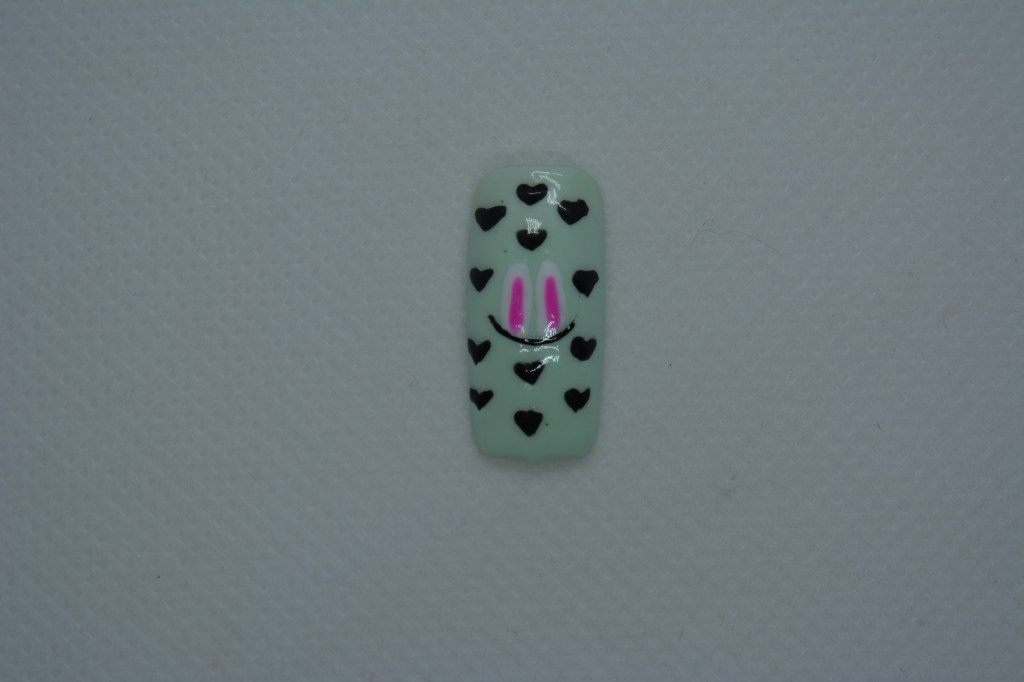
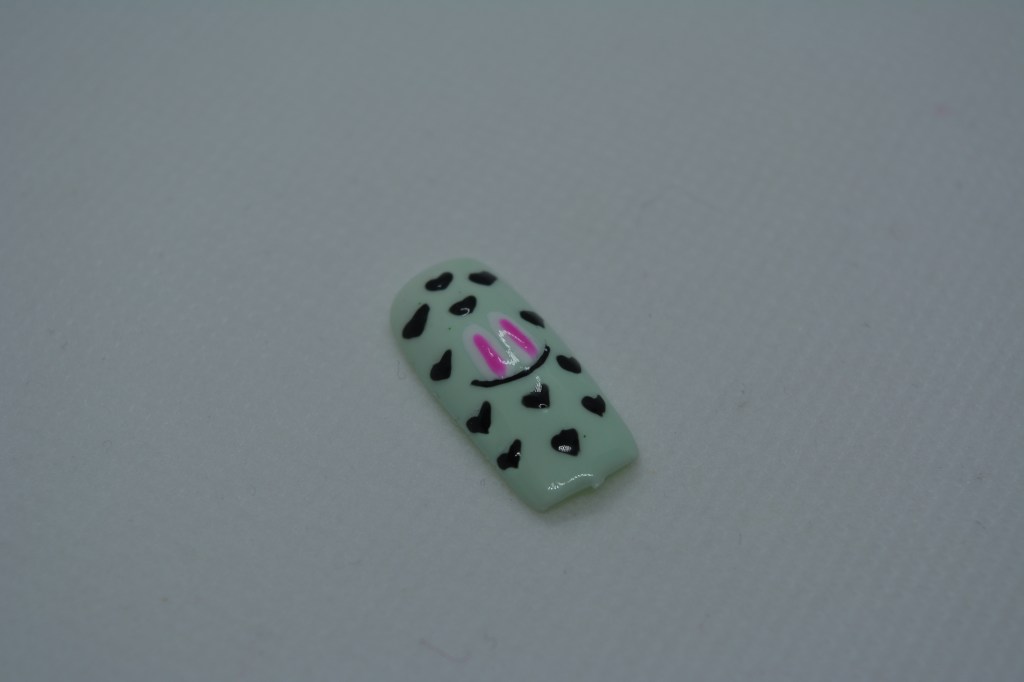
Seconda proposta

Sempre sulla stessa ricostruzione, dopo aver eliminato il vecchio colore, ho deciso di realizzare qualcosa di più complicato.

Io adoro dipingere, non solo le unghie, e nel mio tempo libero su delle tele creo dei paesaggi naturali.

Mi sono anche posta una sfida, ovvero se riuscivo a farlo su una superficie più piccola come le unghie, utilizzando la pittura acrilica.

Ho realizzato qualcosa di tropicale, che mi ricordasse l’estate, stagione che io adoro.

Se volete sapere come utilizzare la pittura acrilica sulle unghie, leggete questo articolo.
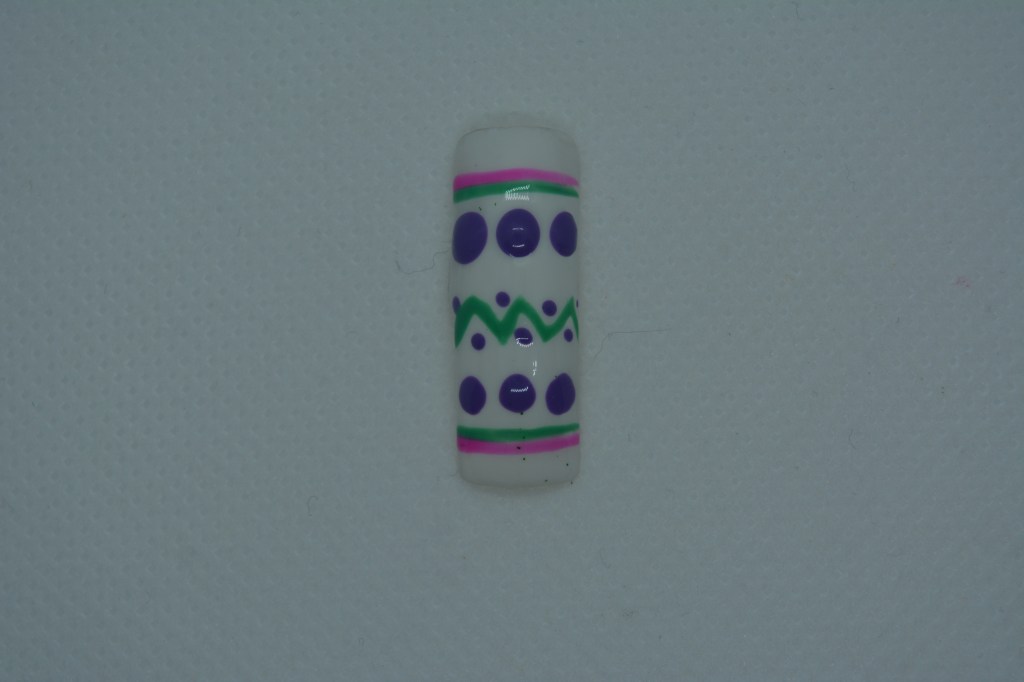
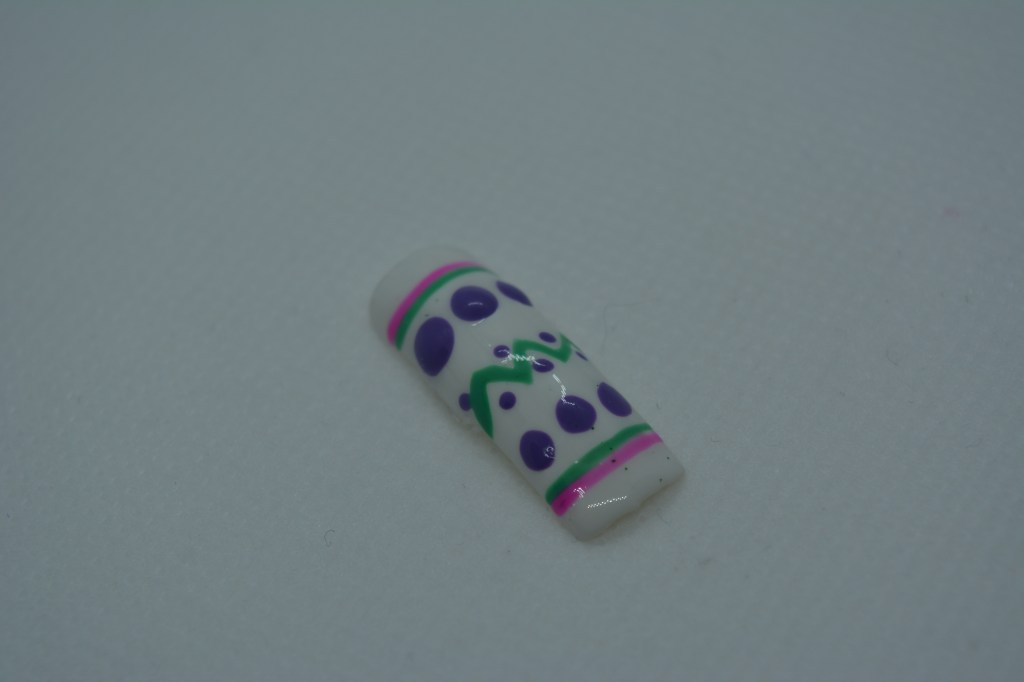
Terza proposta

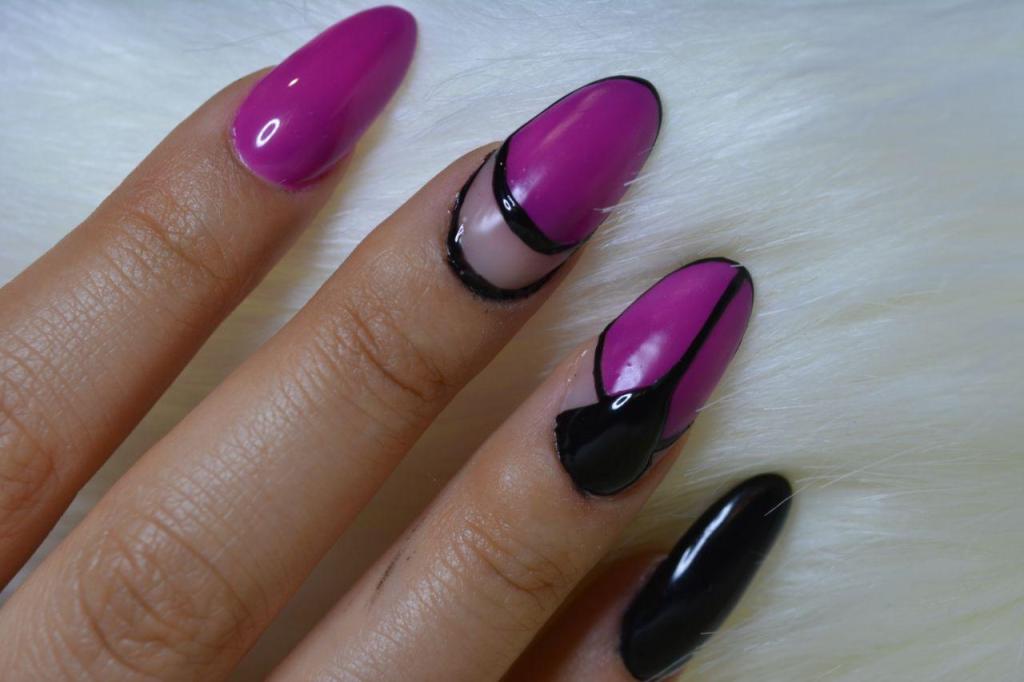
La bellezza sta anche nelle cose più geometriche e astratte.

Quindi sempre utilizzando una tonalità di viola, su una mandorla più corta, ho creato questo decoro, semplice ma lineare.

Quarta proposta

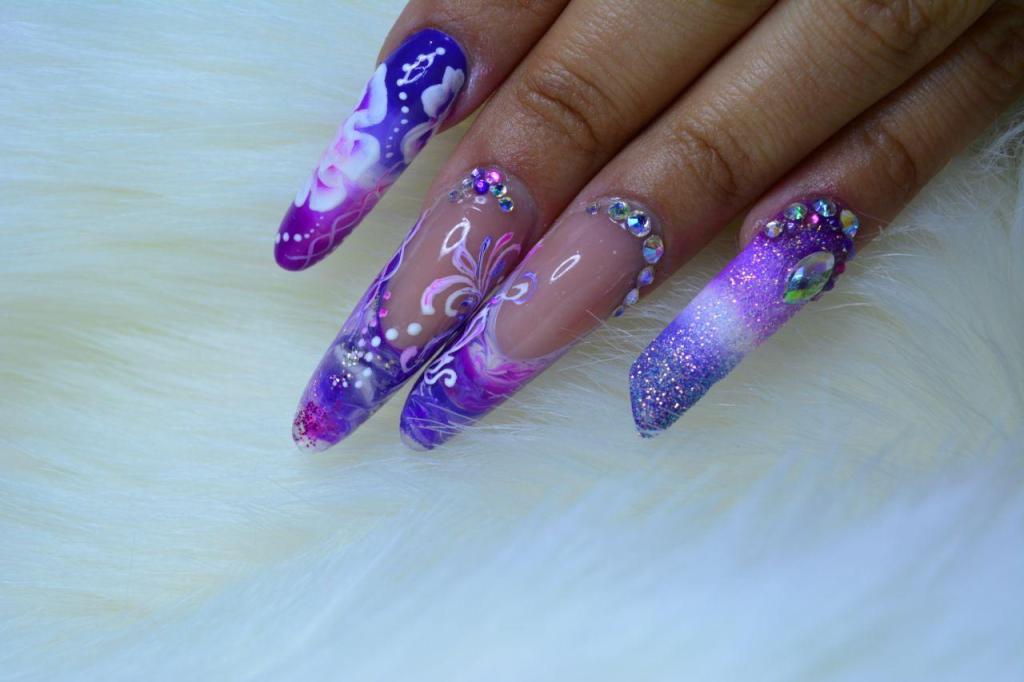
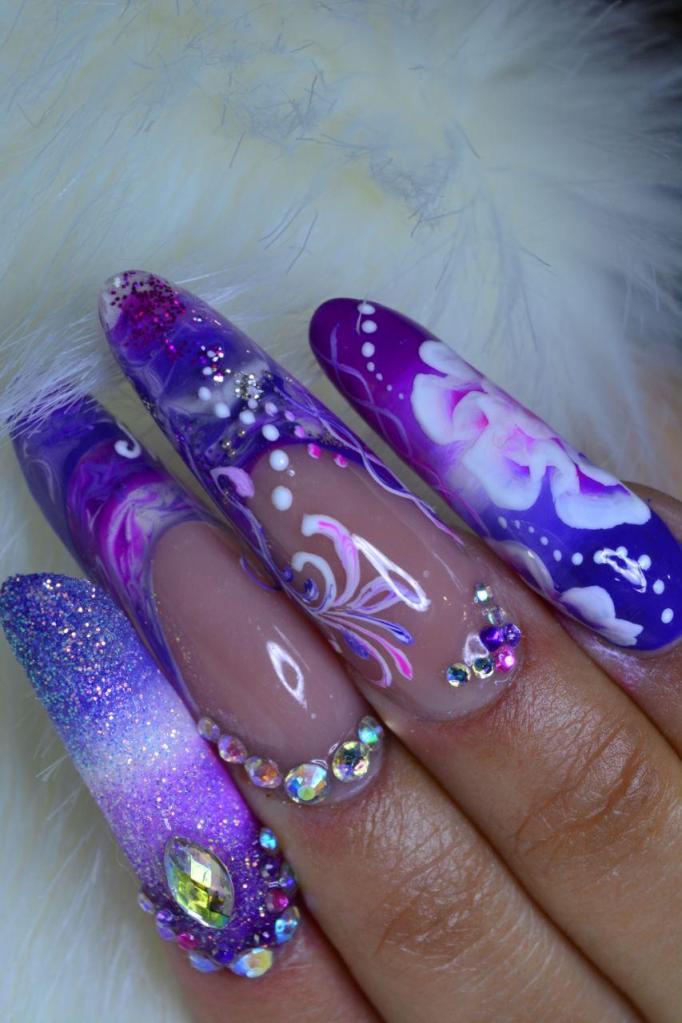
Be avevo pensato che avrei voluto combinare tutto ciò che mi piace sulle unghie.

Il viola, i glitter, gli swaroski, le forme estreme etc..

E questo è ciò che ne è uscito.

Ci ho messo 5 ore, perchè era una cosa abbastanza complessa da realizzare, però ne sono molto soddisfatta e mi piace molto.

Ecco qua le mie proposte per un contest, siate liberi di prendere tutte le idee che volete!

Vi piacciono?

Se questo articolo vi è piaciuto lasciate un like e condividete.

Non dimenticatevi di seguirmi su Instagram e sul mio canale Youtube.

Alla prossima!

SOFIA

My first nail contest!

Goodmorning everyone!

Today I want to tell you about an experience in which I participated: my first nail contest!

Let’s begin!

What’s this


In general, a nail contest is a friendly competition between all nail technicians or girls who want to participate who are passionate about the world of nails.

Since we are all at home, this is a way to relax and focus our strength on something we are passionate about.

Among the many competitions that were there, I decided to participate in that of Valentina Colonna, in collaboration with the company it represents, Mistero Milano.

I liked what she proposed so I chose to participate and the theme was Beauty.

Everyone could achieve what beauty best represented and I gave myself to crazy joy!

First idea

Here are the first nails I made.

You all know that I love purple and therefore I decided to use this beautiful color and create a simple and effective nail art.

The flowers give that extra touch of delicacy and harmony!

Second idea

Still on the same reconstruction, after eliminating the old color, I decided to make something more complicated.

I love painting, not only nails, and in my free time I create natural landscapes on canvases.

I also asked myself a challenge, that is, if I could do it on a smaller surface like nails, using acrylic paint.

I made something tropical, which reminded me of summer, a season that I love.

If you want to know how to use acrylic paint on nails, read this article.

Third idea

Beauty also lies in the most geometric and abstract things.

So always using a shade of purple, on a shorter almond, I created this decoration, simple but linear.

Fourth idea

Well I thought I wanted to combine everything I like on the nails.

Violet, glitter, swaroski, extreme shapes etc ..

And this is what came out of it.

It took me 5 hours, because it was a complex enough thing to do, but I am very satisfied with it and I really like it.

Here are my proposals for a contest, be free to take all the ideas you want!

Do you like them?

If you liked this article, leave a like and share.

Don’t forget to follow me on Instagram and on my Youtube channel.

See you next time!

SOFIA

Manuale di un’ onicotecnica: come trattare le clienti

Bentornati sul mio blog!

Oggi voglio parlarvi di come secondo me, sarebbe meglio trattare una cliente durante il nostro appuntamento: vi mostrerò i punti fondamentali.

Iniziamo!

Gentilezza

La gentilezza è fondamentale durante tutto l’appuntamento.

Le clienti torneranno di sicuro da una ragazza solare piuttosto che da una cupa.

Quando si accoglie la cliente si fa un bel sorriso e le si chiede come sta. Bisogna farla sentire rilassata, a suo agio, come se fosse a casa.

Comunicazione

Tra professionista e cliente deve esserci un’ottima comunicazione.

Bisogna capire cosa vorrebbe la persona, come si è trovata con noi e con il trattamento che le abbiamo fatto.

Durante il lavoro invece di fare di testa nostra, chiediamo se il lavoro che stiamo facendo è come se lo immaginava, e se vorrebbe modifiche, cerchiamo di accontentarla.

Tutto ciò si collega al prossimo punto.

Professionalità

Tramite la comunicazione possiamo dimostrare la nostra professionalità.

Discutiamo con la cliente se ciò che vorrebbe realizzato sia possibile o no, in base alle sue unghie e alle sue esigenze. Una cliente sarà felice se il trattamento le durerà e non le rovinerà le unghie, invece che ottenere ciò che desiderava con brutte conseguenze.

Anche durante il lavoro se per caso ci ponesse una domanda, rispondiamo, magari semplificando i termini, però così facendo istruiremo la persona che in seguito saprà distinguere i trattamenti nocivi da quelli ottimali.

Inoltre la postazione è lo specchio della nostra professionalità. Deve essere ordinata, pulita e anche gli attrezzi devono essere sicuri.

Chiacchiere

A chi non piace fare qualche chiacchiera ogni tanto, soprattutto durante le due ore in cui si effettua un trattamento.

Ovviamente non si deve esagerare perchè bisogna avere modo di concentrarsi su ciò che si fa, però non bisogna neanche ignorare la persona, che magari nel silenzio più totale potrebbe provare imbarazzo o disagio.

Rispetto

In ogni caso bisogna trattare a modo e con rispetto le clienti.

Ci sono persone educate ed altre meno, però bisogna sempre cercare di essere gentili e rispondere a modo a ciò che ci viene detto.

Certamente se qualcuno esagera, allora possiamo, sempre con educazione, rispondere a tono, senza però essere maleducate.

Ecco qua ciò che penso una professionista debba fare nel trattare la cliente.

Se questo articolo vi è piaciuto lasciate un like e condividetelo.

Se volete sul mio canale Youtube ho registrato un video dove eseguo una copertura su un’altra persona, vi lascio qui il link!

Non dimenticate di seguirmi su Instagram e sul mio canale Youtube.

Alla prossima!

SOFIA

Nail tech 101: How to treat a client

Welcome back to my blog!

Today I want to talk to you about how I think it would be better to treat a client during our appointment: I will show you the fundamental points.

Let’s start!

Kindness

Kindness is essential throughout the appointment.

Clients will certainly return to a sunny girl rather than a gloomy one.

When you welcome the client you smile and ask her how she is. You must make her feel relaxed, at ease, as if she were at home.

Communication

There must be excellent communication between the professional and the client.

We need to understand what the person would like us to do, how he found himself with us and with the treatment we did to him.

Instead of doing our own work during the work, we ask if the work we are doing is as he imagined it, and if he would like changes, we try to please him.

This all goes to the next point.

Professionalism

Through communication we can demonstrate our professionalism.

We discuss with the client whether what she would like to achieve is possible or not, based on her nails and needs. A client will be happy if the treatment lasts and does not damage her nails, instead of getting what she wanted with bad consequences.

Even during work, if by chance she ask us a question, we will answer, perhaps by simplifying the terms, but in doing so we will instruct the person who will later be able to distinguish the harmful treatments from the optimal ones.

Furthermore, the workstation is the mirror of our professionalism. It must be tidy, clean and the tools must also be safe.

Chatting

Who does not like to have a chat every now and then, especially during the two hours of treatment.

Obviously one should not exaggerate because one must be able to concentrate on what one does, but one must not even ignore the person, who perhaps in total silence could feel embarrassed or uncomfortable.

Respect

In any case, customers must be treated with respect.

There are polite people and others less, but you must always try to be kind and respond in a way to what we are told.

Certainly if someone exaggerates, then we can always respond politely, without being rude.

Here is what I think a professional should do in dealing with the client.

If you liked this article, leave a like and share it.

If you want on my Youtube channel I recorded a video where I do someone else nails, I leave the link here!

Don’t forget to follow me on Instagram and on my Youtube channel.

See you next time!

SOFIA


Comprare i prodotti per le unghie cinesi è sicuro?

Bentornati sul mio blog!

Oggi voglio discutere di un argomento di cui si sente parlare spesso, ovvero se comprare i prodotti per le unghie dalla Cina sia sicuro.

Iniziamo!

Controlli di sicurezza

Qualsiasi prodotto che viene importato dalla Cina deve aderire a delle regolamentazioni di sicurezza che rispettino il paese in cui entrano.

Questi prodotti durante il trasporto viaggiano con un certificato di conformità che deve essere controllato non appena fanno ingresso.

Se il prodotto non crea sospetti, allora viene immesso senza problemi in commercio, mentre se c’è qualche dubbio sulla merce, allora si interviene.

Il prodotto viene messo in una sorta di quarantena, in modo da essere controllati e testati, in modo da capire se sono sicuri o no.

Nel caso non li fossero semplicemente vengono o distrutti o rispediti al paese di provenienza.

Comunque generalmente parlando potete stare tranquilli, perchè i prodotti facilmente accessibili sono sicuramente sicuri.

Molte persone utilizzano magari colori o altri prodotti provenienti dalla Cina e non hanno riscontrato nessun problema.

Cambio etichetta

Alcuni venditori, per immettere sul mercato sostanze illegali, cambiano l’etichetta del prodotto.

Invece di inserirne una che corrisponda a ciò che c’è nella marce, ne mettono un’altra falsa.

Ciò può ingannare sia la persona che vuole importare i prodotti, sia le autorità che li controllano.

Per questo è importante, in qualsiasi ambito, acquistare un qualsiasi prodotto da un rivenditore affidabile, che si preoccupi di controllare l’integrità di essi.

Fortunatamente grazie a internet possiamo leggere recensioni sul venditore da cui desideriamo acquistare oppure sul prodotto stesso.

Questo scambio di informazioni è molto importante per evitare di rimanere fregati.

Comunque è sconsigliato comprare prodotti direttamente dal mercato cinese e poi importarli tu stesso, perchè probabilmente non avrai le capacità di capire se un prodotto è valido o no, non saprai mai cosa ti capita per le mani.

Prodotti contraffatti

Un altro problema, ma ciò non riguarda solo la Cina, è quello dei prodotti contraffatti.

Noi pensiamo di acquistare il prodotto originale, ma molto spesso sono solo una copia molto più economica, perchè non sono prodotti nelle giuste condizioni igieniche, oppure i materiali usati sono nocivi e scadenti.

Per evitare ciò, controllate se il venditore è affidabile, e cosa molto importante, acquistate prodotti solo da rivenditori autorizzati.

In conclusione, con le giuste accortezze, i prodotti cinesi sono validi, l’importante è informarsi sul venditore da cui compriamo e far attenzione che sia autorizzato e affidabile.

Ciò vale per qualsiasi prodotto comunque, non solo quelli provenienti dalla Cina.

Spero che questo articolo vi sia piaciuto, lasciate un like e condividete.

Non dimenticatevi di seguirmi su Instagram e sul mio canale Youtube.

Alla prossima!

SOFIA

Is it safe to buy nail products form China?

Welcome back to my blog!

Today I want to discuss a topic that you often hear about, namely whether buying nail products from China is safe.

Let’s start!

Security checks

Any product that is imported from China must comply with safety regulations that respect the country in which they enter.

These products during transport travel with a certificate of conformity which must be checked as soon as they enter.

If the product does not create suspicions, then it is placed on the market without problems, while if there is any doubt about the goods, then action is taken.

The product is put in a sort of quarantine, in order to be checked and tested, in order to understand if they are safe or not.

If they are not, they are simply destroyed or sent back to the country of origin.

However, generally speaking, you can rest assured, because easily accessible products from China are certainly safe.

Many people are probably using colors or other products from China and have not encountered any problems.

Change of label

To sell illegal substances, some sellers change the product label.

Instead of inserting one that matches what’s in the gear, they put another fake one.

This can fool both the person who wants to import the products and the authorities that control them.

For this reason it is important, in any context, to purchase any product from a reliable retailer who is concerned with checking the integrity of the products.

Fortunately, thanks to the internet, we can read reviews on the seller we want to buy from or on the product itself.

This exchange of information is very important to avoid being screwed.

However, it is not recommended to buy products directly from the Chinese market and then import them yourself, because you probably won’t have the ability to understand if a product is valid or not, you will never know what you will buy.

Counterfeit products

Another problem, but this does not concern only China, it is that of counterfeit products.

We think of purchasing the original product, but very often they are only a much cheaper copy, because they are not produced in the right hygienic conditions, or the materials used are harmful and poor.

To avoid this, check if the seller is reliable, and very importantly, buy products only from authorized dealers.

In conclusion, with the right precautions, the Chinese products are valid, the important thing is to inquire about the seller from whom we buy and make sure that it is authorized and reliable.

This applies to any product, however, not just those from China.

I hope you enjoyed this article, leave a like and share.

Don’t forget to follow me on Instagram and on my Youtube channel.

See you next time!

SOFIA

Idee nail art di Pasqua

Bentornati sul mio blog!

Il giorno di pasqua si sta avvicinando, quindi ho pensato di mostrarvi qualche idea carina da realizzare.

Lo so, in Italia, ma anche in tutti gli altri paesi del mondo stiamo passando un periodo poco allegro ma ho deciso di mostrarvi queste idee così potrete realizzare su di voi delle unghie carine, e voglio tenervi compagnia con i miei articoli.

Coniglietto

Tipico simbolo di pasqua è il coniglietto bianco.

Su una base azzurro chiaro ho realizzato la sagoma di un coniglietto visto da dietro.

Ho realizzato la sua morbida coda con il rosa.

Pois

Possiamo abbinare a tutte queste nail art a tema pasquale, una più semplice.

Si può scegliere un colore a nostra scelta, pastello.

Quindi con il bianco e con un dotter abbastanza sottile realizzo dei puntini bianchi.

Pulcino

Anche i pulcini sono animali simbolo della pasqua.

Realizzo prima una base gialla, per fare il pelo del pulcino.

Poi con il bianco realizzo il guscio rotto del pulcino.

Con il nero e il bianco realizzo gli occhietti e con l’arancione un triangolino che rappresenta il becco.

Uovo

Le uova decorate sono un must have sulle tavole!

Realizzo una base bianca.

Con l’azzurro tiffany faccio in alto e in basso una linea orizzontale.

Ripeto la stessa cosa con il rosa.

Uso un viola chiaro e faccio dei puntini piuttosto grandi in alto.

Sotto questi puntini con l’azzurro creo una riga a zigzag.

Per completare il tutto aggiungo dei puntini viola.

Coriandoli

Volendo si può realizzare anche qualcosa di più neutro, ma anche allegro.

Scelgo un colore di base a mia scelta e applico queste decorazioni.

Sono di diversa grandezza e colore, li applico a mio piacimento.

Fiori

Siamo comunque in primavera quindi possiamo scegliere di applicare dei fiori secchi per creare una sorta di prato, con effetto sottovetro.

Orecchiette

Concludiamo con un altro coniglietto.

Utilizzo un azzurro tiffany per realizzare la base.

Con il nero faccio una linea che rappresenta la tasca dove sta il coniglio e con il bianco faccio al di sopra delle orecchie che sbucano.

Aggiungo il rosa e faccio l’interno delle orecchie.

Concludo realizzando a scacchi dei piccoli cuoricini neri.

Ecco qua le mie proposte.

Vi piacciono?

Se questo articolo vi è piaciuto lasciate un like e condividete.

Non dimenticate di seguirmi su Instagram e sul mio canale Youtube.

Alla prossima!

SOFIA

Easter nail art ideas

Welcome back to my blog!

Easter is approaching, so I thought I’d show you some nice ideas to do.

I know, in Italy, but also in all the other countries of the world we are having a little happy time but I decided to show you these ideas so you can make nice nails on you, and I want to keep you company with my articles.

Rabbit

A typical Easter symbol is the white bunny.

On a light blue base I made the shape of a bunny seen from behind.

I made his soft pink tail.

Pois

We can combine all these Easter-themed nail art with a simpler one.

You can choose a color of our choice, pastel.

So with white and with a fairly subtle dotter I make white dots.

Chick

Chicks are also symbols of Easter.

I first make a yellow base, to make the fur of the chick.

Then with white I make the broken shell of the chick.

With black and white I make the eyes and with orange a triangle that represents the beak.

Egg

Decorated eggs are a must have on the tables!

I make a white base.

With the tiffany blue I make a horizontal line at the top and bottom.

I repeat the same thing with pink.

I use a light purple and make rather large dots at the top.

Under these blue dots I create a zigzag line.

To complete it all I add purple dots.

Confetti

If you want you can also achieve something more neutral, but also cheerful.

I choose a base color of my choice and apply these decorations.

They are of different sizes and colors, I apply them to my liking.

Flowers

We are still in the spring so we can choose to apply dried flowers to create a sort of grass, with a glass effect.

Ears

Let’s end with another bunny.

I use a tiffany blue to make the base.

With black I make a line that represents the pocket where the rabbit is and with white I make above the ears that come out.

I add pink and do the inside of the ears.

I conclude by making little black hearts in checkered.

Here are my suggestions.

Do you like them?

If you liked this article, leave a like and share.

Don’t forget to follow me on Instagram and on my Youtube channel.

See you next time!

SOFIA

Posso ricostruire un'unghia in 10 minuti?

Bentornati sul mio blog!

Oggi voglio mostrarvi i risultati di una sfida che mi sono posta.

La scorsa volta ho realizzato un’unghia lunghissima, di 10 cm, vi lascio qui il link del video.

Questa volta mi sono concentrata sul tempo di realizzazione.

Ho scelto di ricostruire in cartina tre unghie, con tempo diverso: una in un’ora, una in 30 minuti e una in 10 minuti.. si avete letto bene, continuate a leggere per sapere com’è finita.

Iniziamo!

1 Ora

Durante la realizzazione di quest’unghia mi sono presa tutto il tempo che mi serviva, per fare un lavoro preciso.

Ho eseguito la preparazione dell’unghia usando 3 punte fresa, per rimuovere le cuticole e opacizzare la superficie delle unghie, ho usato una lima delicata per dare forma e opacizzare ulteriormente la lamina.

Ho applicato tutti e tre i preparatori e misurato con estrema cura la cartina, in modo da metterla più correttamente possibile.

Ho applicato una base utilizzando un pennellino sottile e rispettato i tempi di polimerizzazione.

Ho quindi eseguito l’allungamento con il gel, pinzato e catalizzato.

Ho quindi rimosso la cartina ed eseguito la struttura.

Ho scelto di limare con la lima perchè tanto avevo parecchio tempo e volevo avere il massimo controllo su ciò che stavo facendo.

Una volta finito di limare sono passata al colore.

Ho steso con estrema cura due mani di colore rosa, raggiungendo il giro cuticole con un pennellino molto sottile, senza mai toccare la pelle.

Una volta catalizzato ho sgrassato il colore e passato delicatamente il buffer per opacizzare la superficie.

Ho realizzato quindi un french con il rosso, sono stata molto attenta a farlo preciso.

Ho catalizzato e creato un fiore e un ghirigoro, andando in seguito in lampada.

Stava per terminare la mia ora, ho quindi applicato al centro del fiore una perla e sigillato con un lucido con dispersione.

Una volta sgrassato ho applicato l’olio per cuticole ed ecco l’unghia realizzata in 1 ora.

Vi piace? Io sono abbastanza soddisfatta del risultato.

30 minuti

Per realizzare quest’unghia avevo abbastanza tempo ma non troppo per perdermi nei dettagli.

Il procedimento che ho eseguito è lo stesso di prima ma un po’ più veloce ed eliminando alcune cose.

Ho saltato l’opacizzazione dell’unghia con la lima, ho limato con la fresa la struttura in modo da essere un po’ più veloce.

Il colore l’ho steso senza però utilizzare il pennellino fine.

Ho realizzato il french, però non sono stata precisa come il primo e senza catalizzare ho realizzato già il fiore e il ghirigoro.

Ho applicato poi la mezza perla e un lucido senza la dispersione per essere più veloce.

Ho passato il lucido ed ecco fatto.

Allora come sono stata?

In generale non mi dispiace però avrei potuto limare maggiormente sui laterali per sgonfiare la struttura e sulla parte centrale il french è un po’ traballante.

Ora ci sarà da divertirsi.

10 minuti

Avete presente tutte le regole che si devono seguire per ricostruire in modo corretto un’unghia? Bene dimenticatele 😂

Ho fatto una corsa contro il tempo.

Ho opacizzato l’unghia con la lima velocemente, e misurato la cartina.

Quindi ho applicato il nail prep e il binder che è un po’ più veloce ad asciugarsi.

Ho messo la cartina e applicato il monofasico come base, senza catalizzare eseguo l’allungamento e anche la bombatura, allora mando in lampada.

Ovviamente il prodotto era parecchio e quindi un po’ andava dove voleva.

Ho limato velocemente con la fresa e sono passata al colore.

Non ho applicato il rosa e direttamente con il pennello del colore ho disegnato il french. Senza catalizzare ho fatto il fiore e il ghirigoro.

Catalizzo solo per 30 secondi e metto il lucido senza dispersione e sopra ci ho messo la mezza perla.

Catalizzo solo per 30 secondi e applico l’olio.

Ho finito giusto in tempo ed ecco qua il risultato finale.

Questa foto si commenta da sola.

Nonostante la avessi appena realizzata l’unghia presentava già sollevamenti, il french è sproporzionato, catalizzato male e anche il fiore non è ben fatto.

Quindi è possibile realizzare la ricostruzione di un’unghia in 10 minuti?

Sì, ma il risultato non sarà ben fatto.

Ecco le unghie a confronto.

Mi sono divertita parecchio a realizzare questa sfida.

Ho anche realizzato un video youtube così potrete vedere come ho fatto, vi lascio qui il link.

Questo articolo è finito, spero che vi sia piaciuto.

Se volete lasciate like e condividete.

Seguitemi anche su Instagram e sul mio canale Youtube.

Alla prossima!

SOFIA

Can I make a nail extension in 10 minutes?

Welcome back to my blog!

Today I want to show you the results of a challenge that I asked myself.

Last time I made a very long 10 cm nail, I leave you the video link here.

This time I focused on time.

I chose to reconstruct three nails with the nail form, with different time: one in an hour, one in 30 minutes and one in 10 minutes .. yes you read that right, read on to find out how it ended.

Let’s start!

1 hour

During the making of this nail I took all the time I needed to do a precise job.

I carried out the preparation of the nail using 3 efile bits, to remove the cuticles and opacify the surface of the nails, I used a delicate file to shape and further opacify the foil.

I applied all three preps and measured the nail form with extreme care, so as to put it as correctly as possible.

I applied a base using a thin brush and respected the polymerization times.

I extended the nail with the gel.

I then removed the nail form and created the structure.

I chose to file with the file because I had so much time and I wanted to have maximum control over what I was doing.

Once I finished filing I switched to color.

I applied two pink hands with extreme care, reaching the cuticle with a very thin brush, without ever touching the skin.

Once catalyzed I degreased the color and gently passed the buffer to opacify the surface.

So I made a French with red, I was very careful to make it precise.

I catalyzed and created a flower and a twirl, going later in the lamp.

My hour was about to end, so I applied a pearl to the center of the flower and sealed it with a dispersion top coat.

Once degreased I applied the cuticle oil and here is the nail made in 1 hour.

Do you like it? I am quite satisfied with the result.

30 minutes

To make this nail I had enough time but not too much to get lost in the details.

The procedure I have done is the same as before but a little faster and eliminating some things.

I skipped the nail opacification with the file, I filed the structure with the e-file to be a little faster.

I applied the color without using the fine brush.

I made the French, but I wasn’t as precise as the first and without catalyzing I already made the flower and the twirl.

I then applied half a pearl and a polish without dispersion to be faster.

I applied the top coat and that’s it.

So how is it?

In general it’s fine but I could have filed more on the sides to deflate the structure and on the central part the French is a bit shaky.

Now there will be fun.

10 minutes

Are you aware of all the rules that must be followed to correctly reconstruct a nail? Well forget them all. 😂

I ran against time.

I opacified the nail with the file quickly, and measured the nail form.

So I applied the nail prep and the binder which is a little faster to dry.

I put the nail form and applied the monophasic as a base, without catalyzing I perform the extension and also the structure, then I send in a lamp.

Obviously the product was quite a lot and therefore it went a little where it wanted.

I quickly filed with the e-file and switched to color.

I didn’t apply pink and directly with the color brush I drew French. Without catalyzing I made the flower and the twirl.

I catalyze only for 30 seconds and put the top coat without dispersion and I put the half pearl on it.

I catalyze for only 30 seconds and apply the oil.

I finished just in time and here is the final result.

This photo speaks for itself.

Although I had just made it, the nail already had lifting, the French is disproportionate, badly catalyzed and even the flower is not well done.

So is it possible to make a nail reconstruction in 10 minutes?

Yes, but the result will not be well done.

Here are the nails in comparison.

I had a lot of fun doing this challenge.

I also made a youtube video so you can see how I did it, I leave the link here.

This article is finished, I hope you enjoyed it.

If you want, leave it like and share.

Follow me also on Instagram and on my Youtube channel.

See you next time!

SOFIA